Cornwall Falls 2021

Quite some time ago, several friends had told me about the existence of a waterfall at Cornwall, but no one could tell me where it was. I had a good map stare, and decided where I thought it should be, or hoped it might be, and drove to Cornwall to test my theory. I got to the road I wanted to follow, but grew uncertain as to whether I was allowed to go along it. Luckily, someone looked to be home at the nearest house, so I asked, and they said it was fine to go along, and yes, there was a waterfall along there. My dog was even welcome, but as they warned me that snakes were likely, Tess had to view the falls on the lead.

Wahlenbergia gracilis

The forest was pleasant enough, and the walk far too short to justify a long drive,  but it was a nice place to be if you happened to be passing by on the way to the coast. On my first visit, there was only a trickle, so I waited for a decent dump over on the east before returning. I decided the rain of last week should do the trick, so called back in on Friday. I was rewarded with water falling this time.

Cornwall Falls

It is worth going a little beyond the falls, as far as the next creek. There is an old “building” of interest, covered in greenery in that next gully.  There is a place to park where my blue line begins.

Cornwall Falls route


Split Rock Falls, Shower Cave Falls, Cleft Rock Falls 2018 Nov

Split Rock Falls, Shower Cave Falls, Cleft Rock Falls 2018 Nov

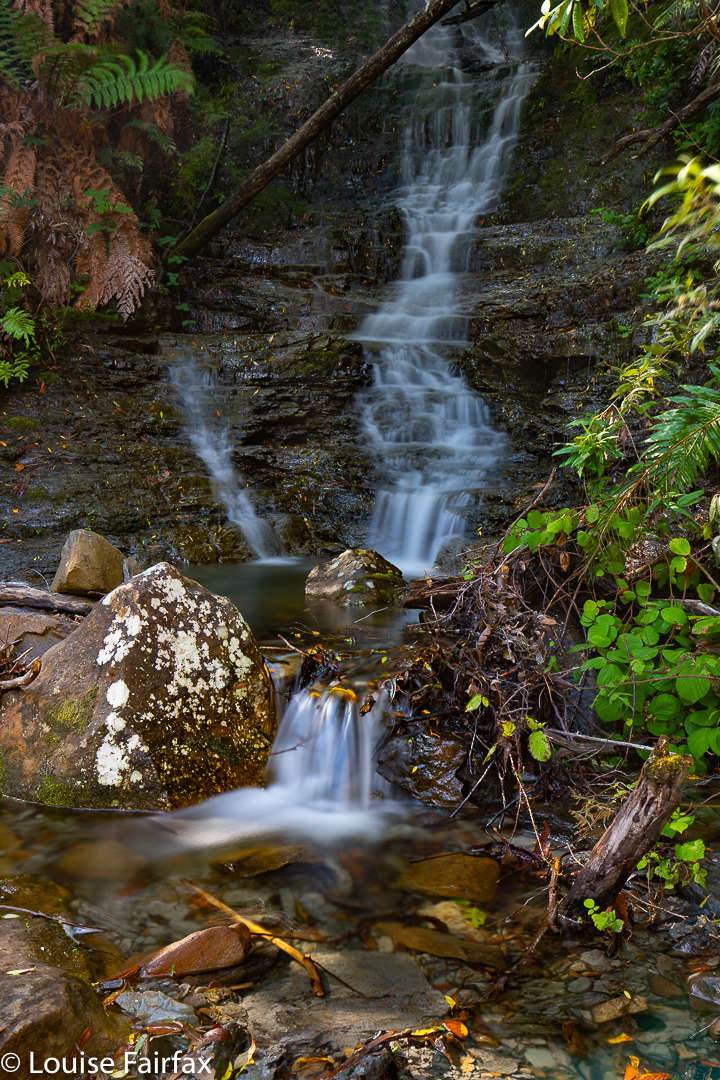
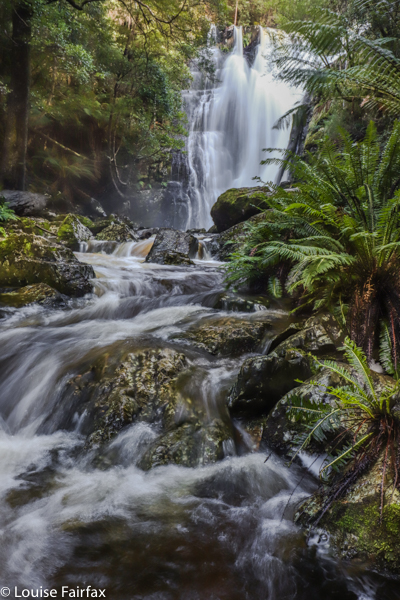
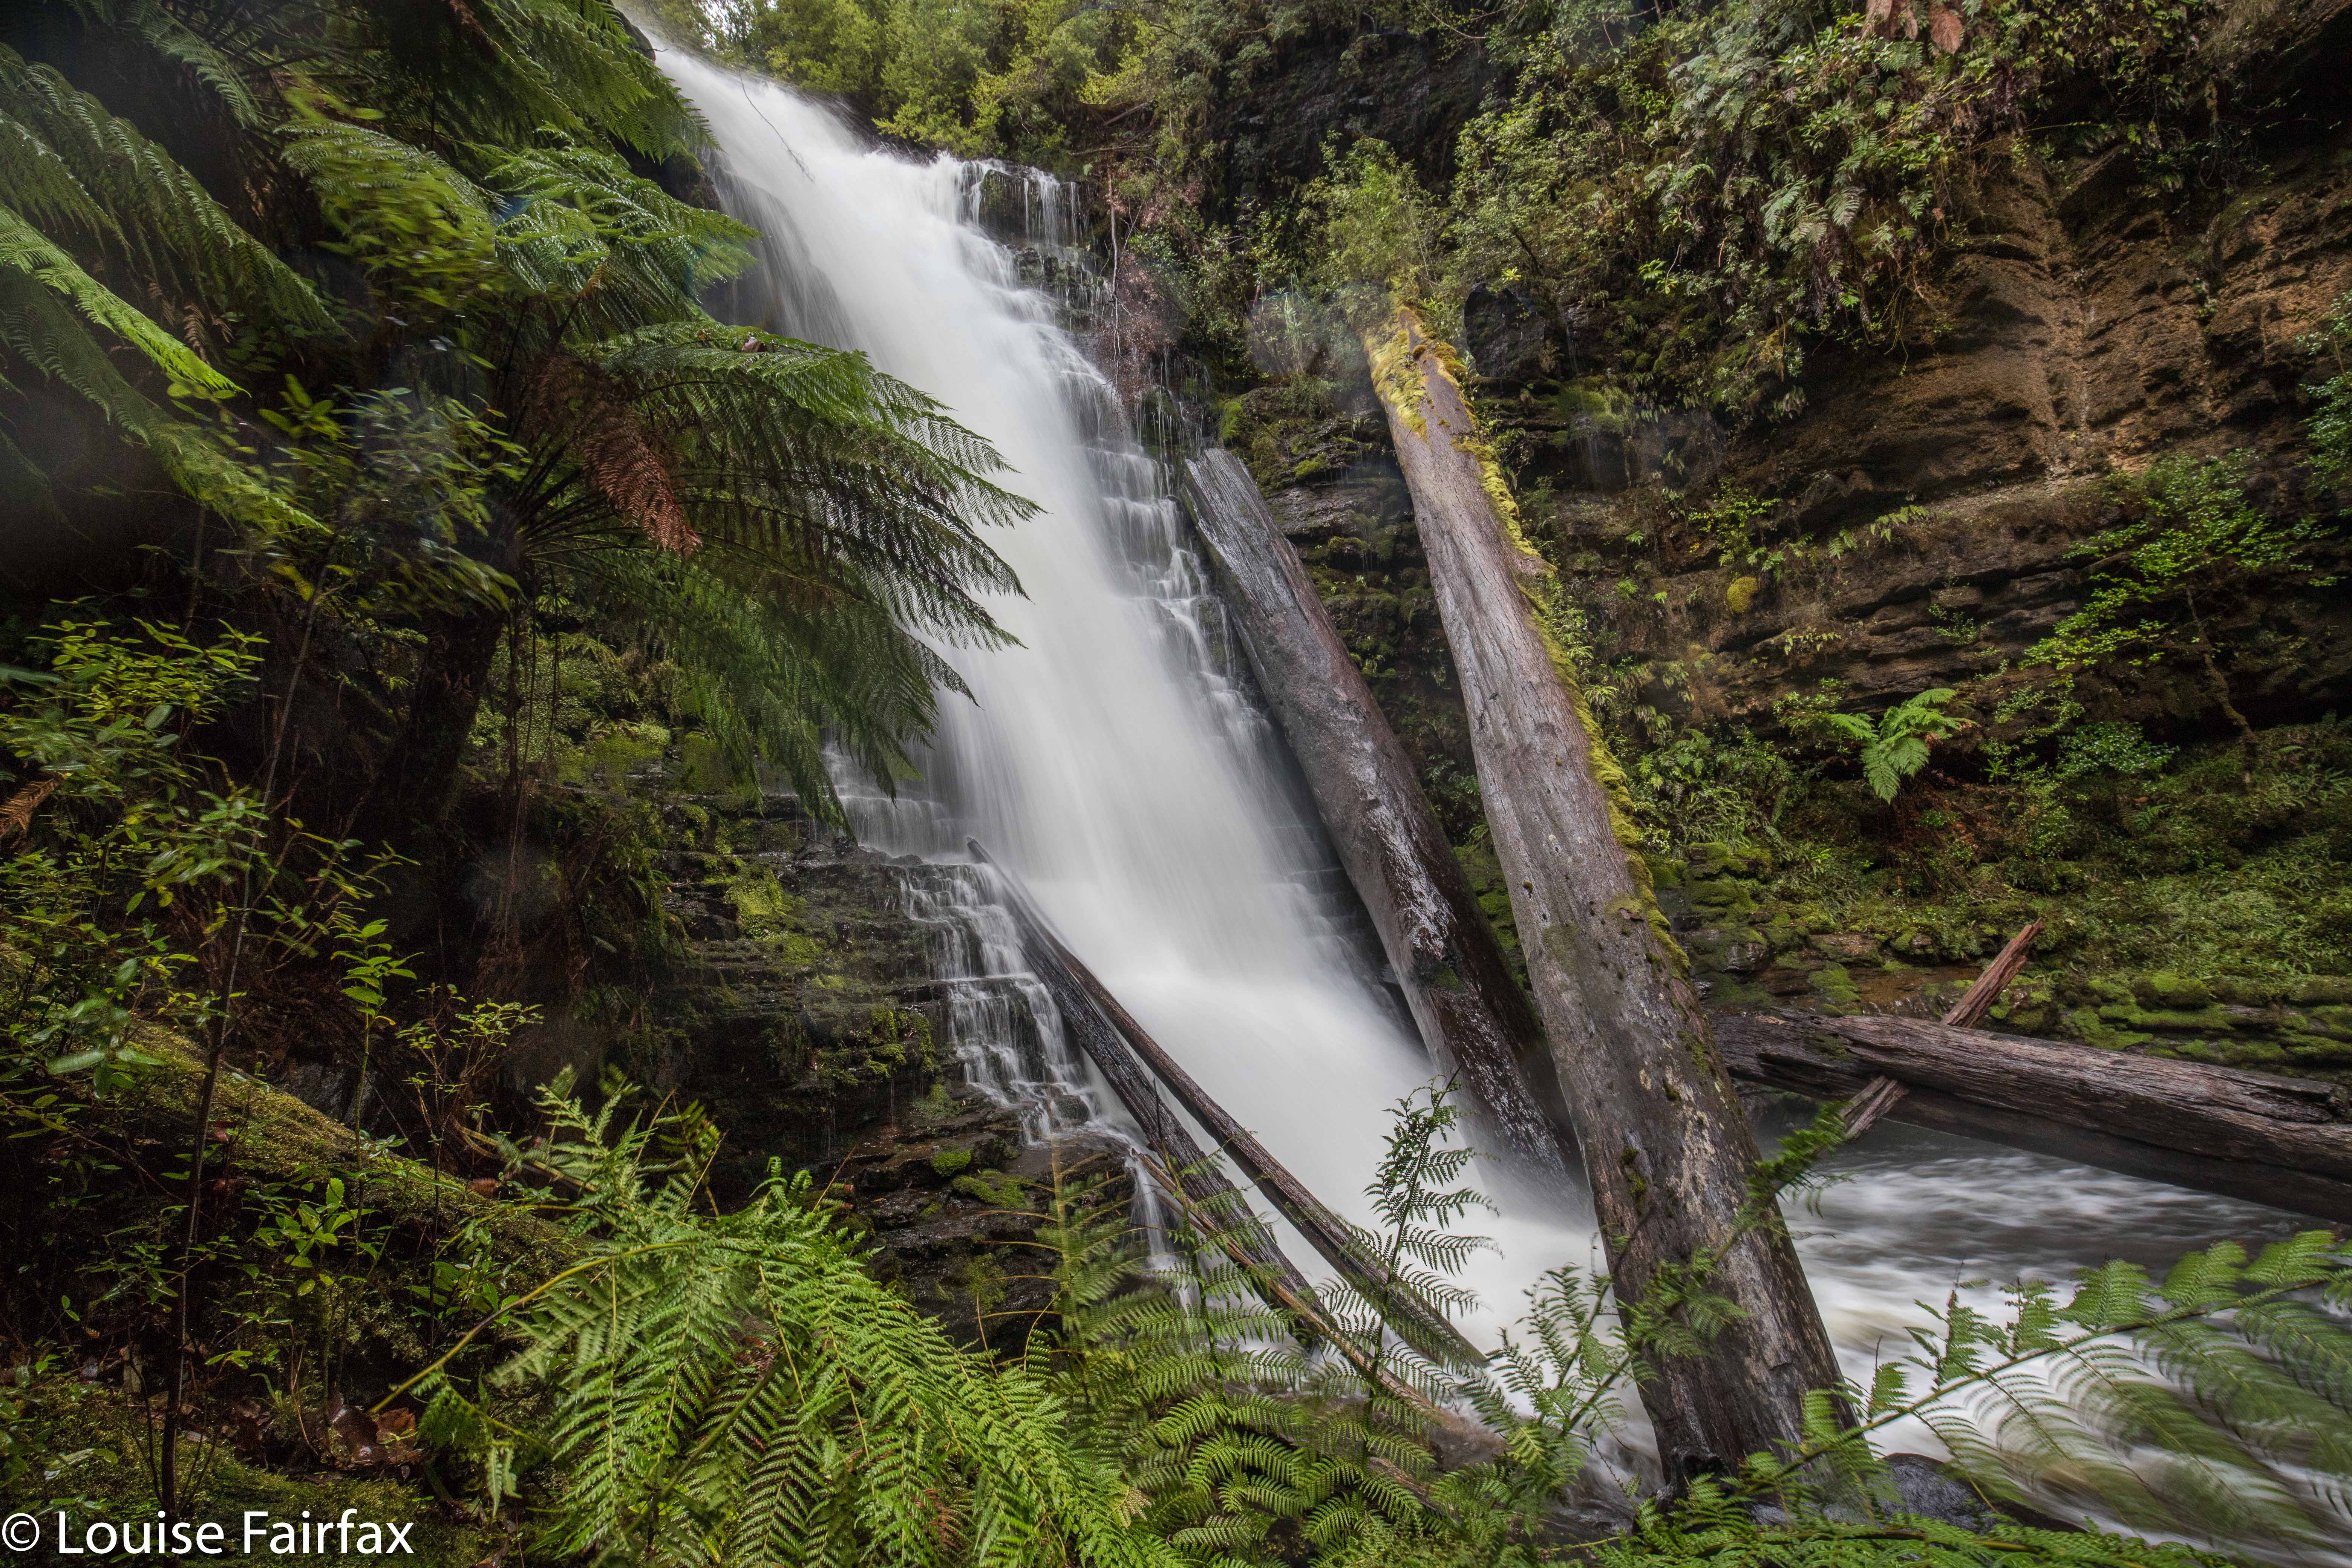
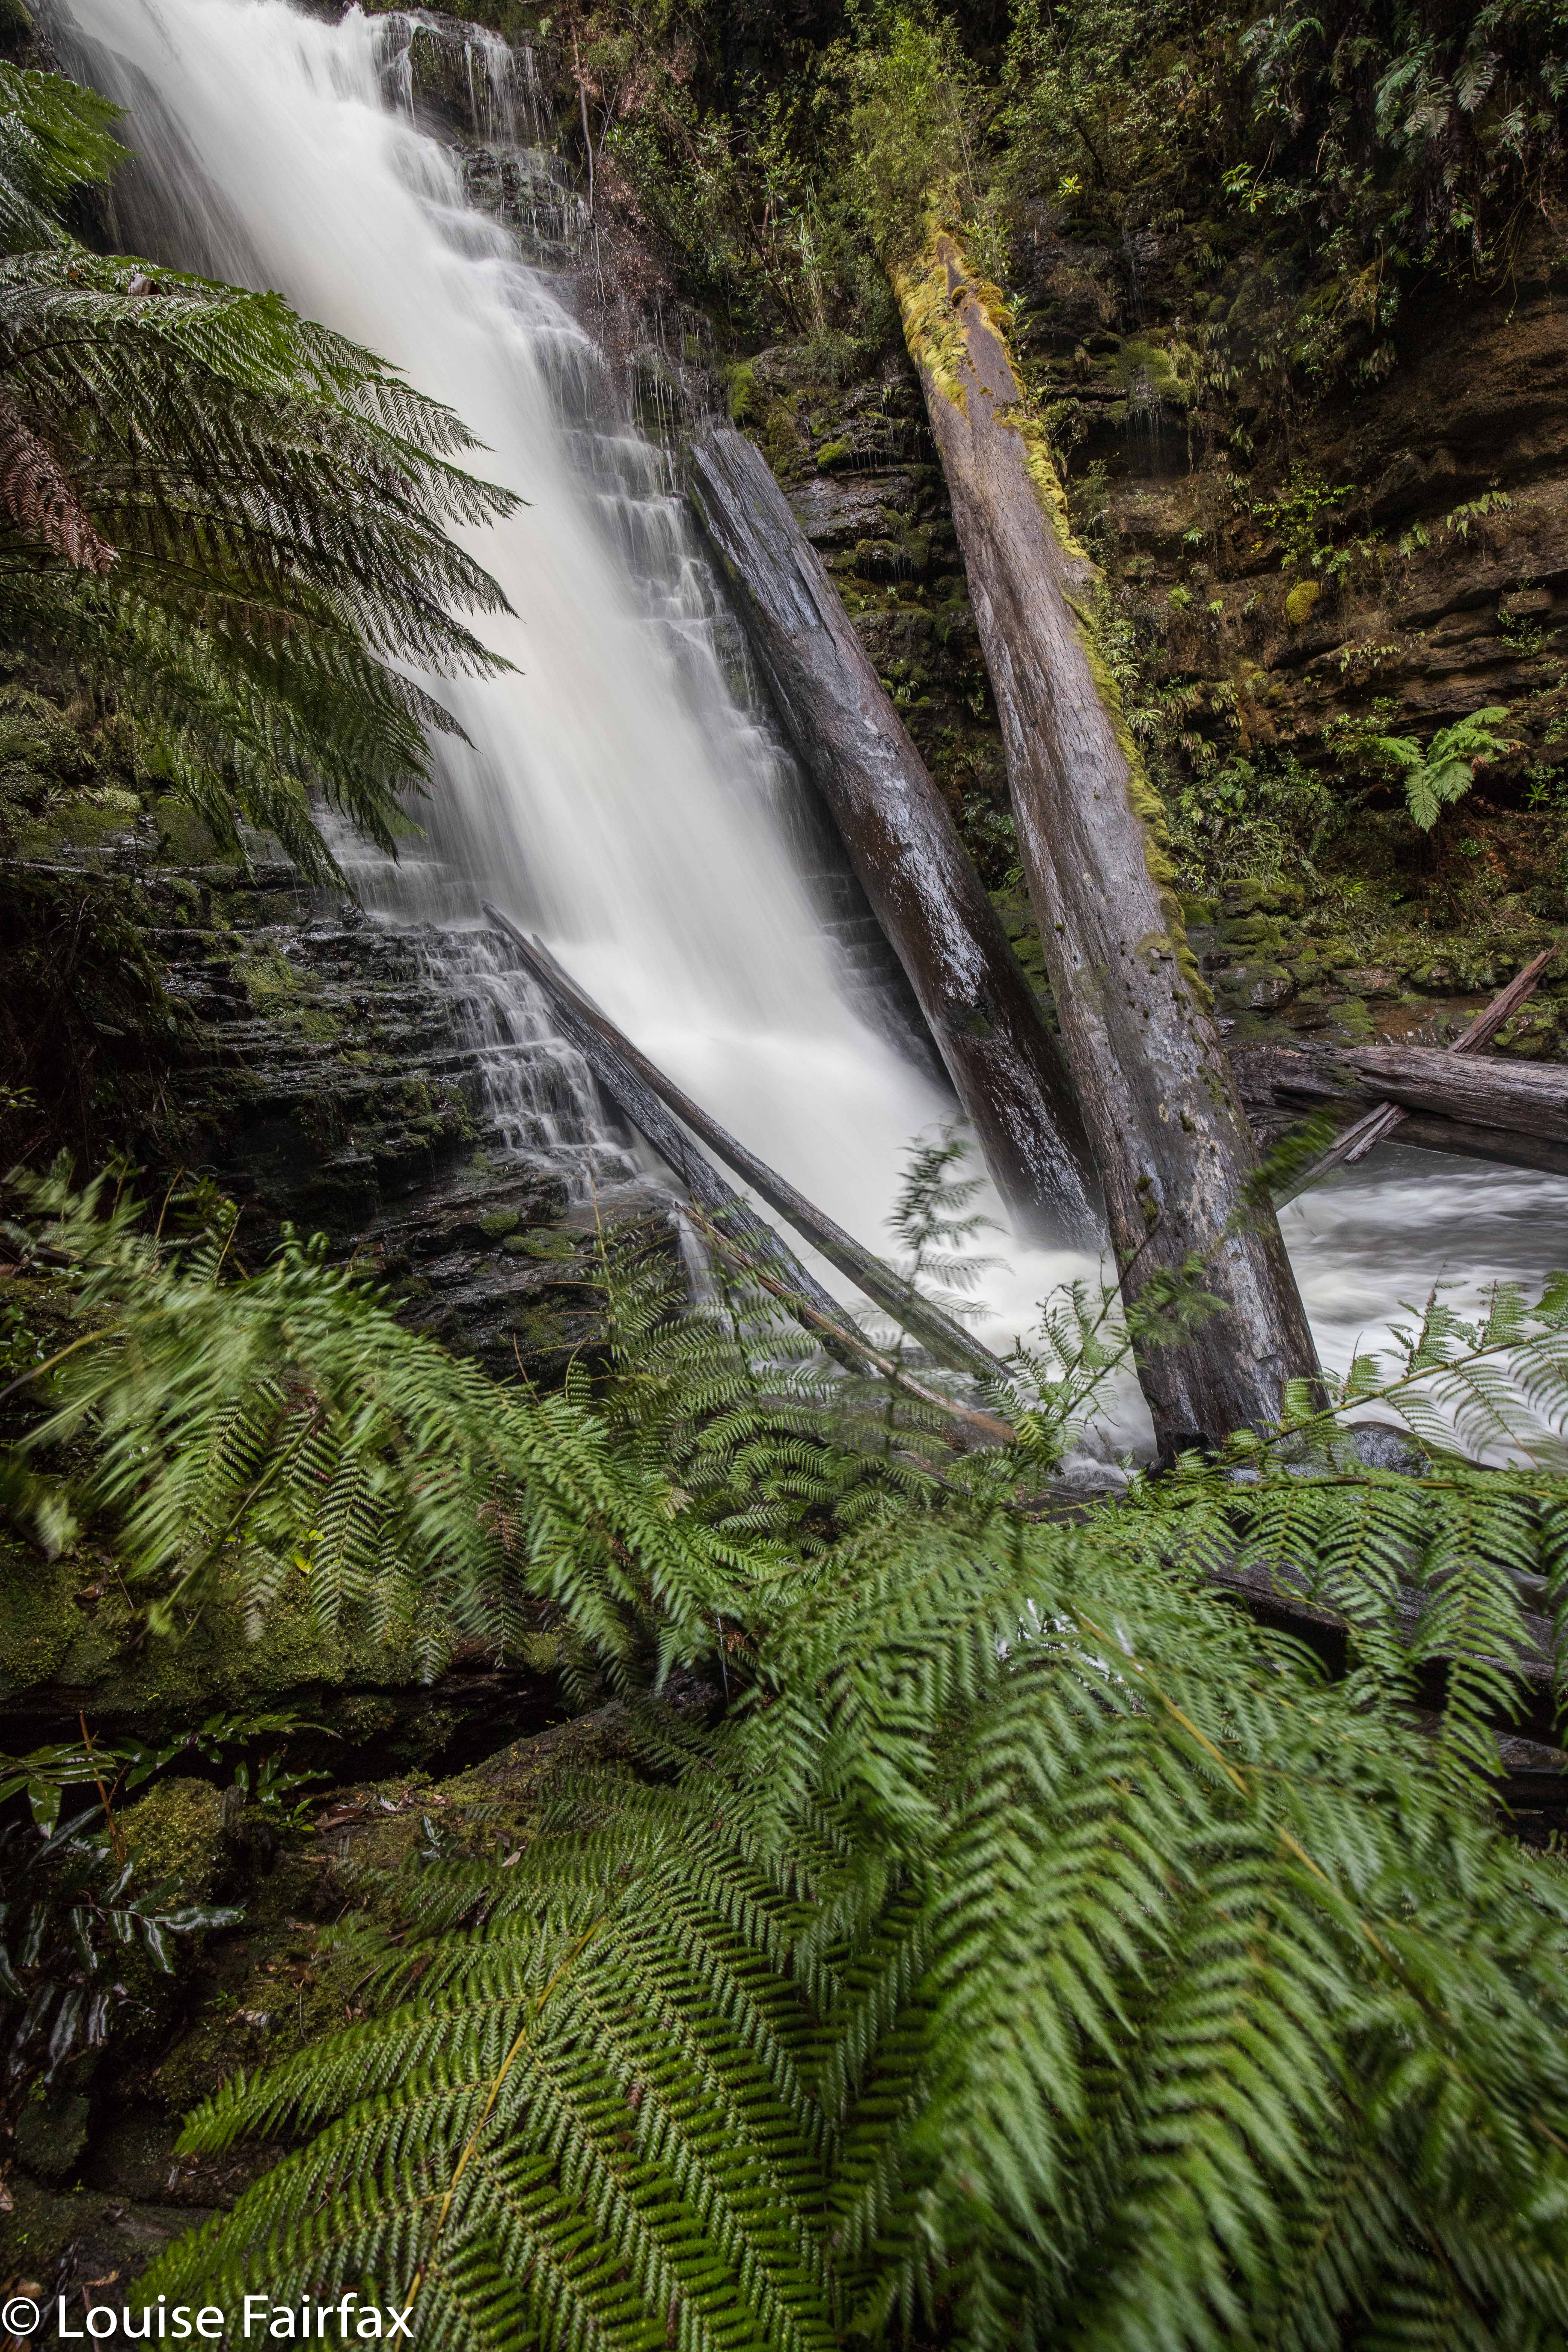
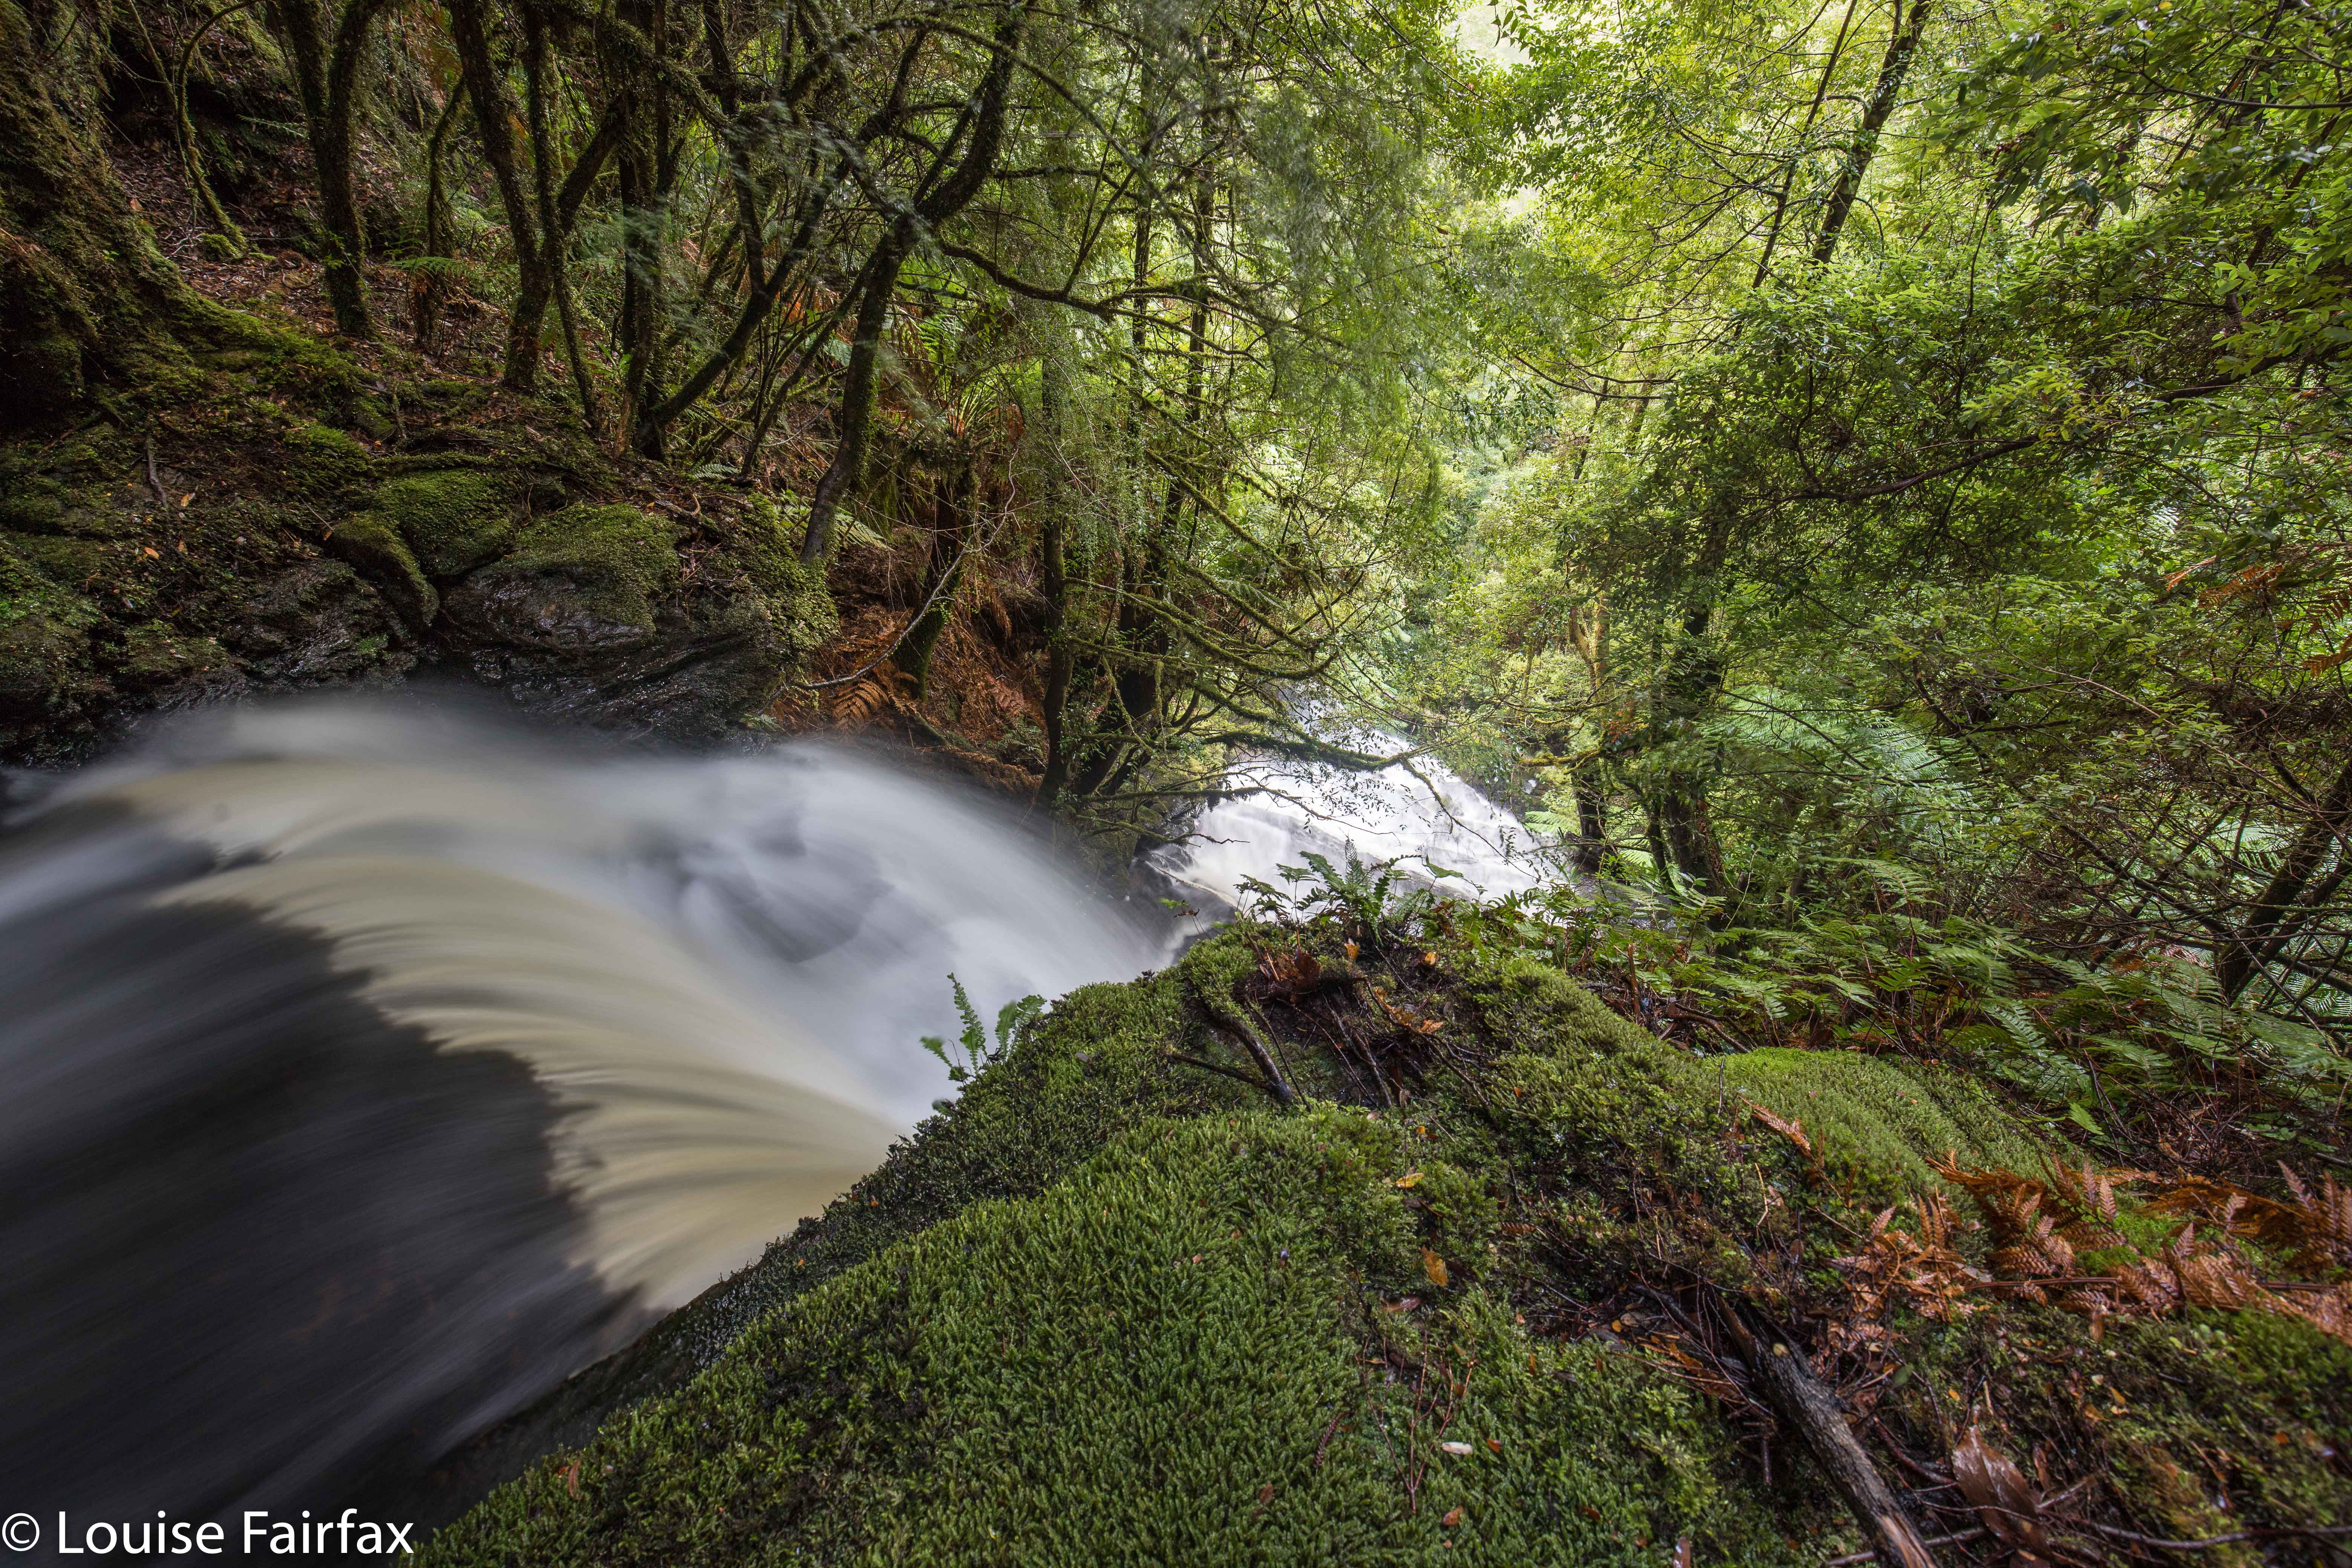
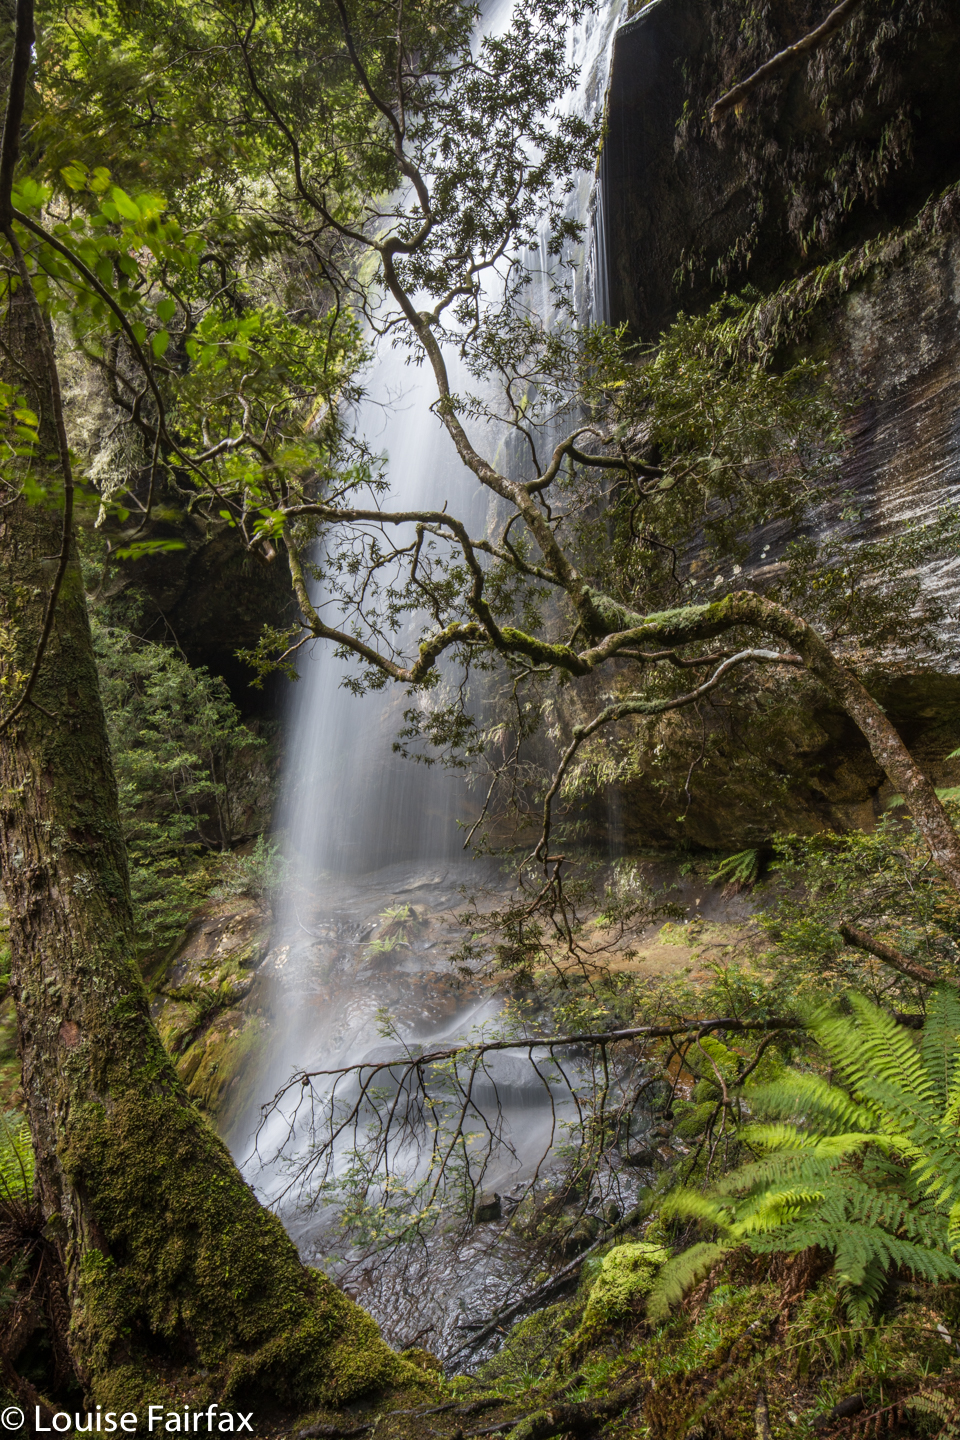
Split Rock Falls (Cleft Rock Falls) 
I have caught a cold (sob), so didn’t feel like running, and thus made the excellent decision that I should substitute waterfall bagging for running, and that my chosen ones for the day should be Shower Cave Falls and Split Rock or Cleft Rock Falls (these falls go by both names: the map calls them Cleft Rock Falls, but locals refer to them as Split Rock Falls, ignoring the map. I’m covering both bases for search engines here). I chose these, as the map suggested that, although the climb was very steep, the distance was short, so it would be a good, but not overly long, workout. I was right. It took me 22 minutes to get from the car to Split Rock (a fantastic hunk of rock if ever I saw one); another 6 minutes to the base of Shower Cave Falls, and I was at the top of Split Rock Falls in a total of just under 38 minutes: a perfect workout. And then the photography began. As with yesterday, I took 90 photos, which is a big editing job for later, but when the area is so magically beautiful, it’s just very hard to stop.
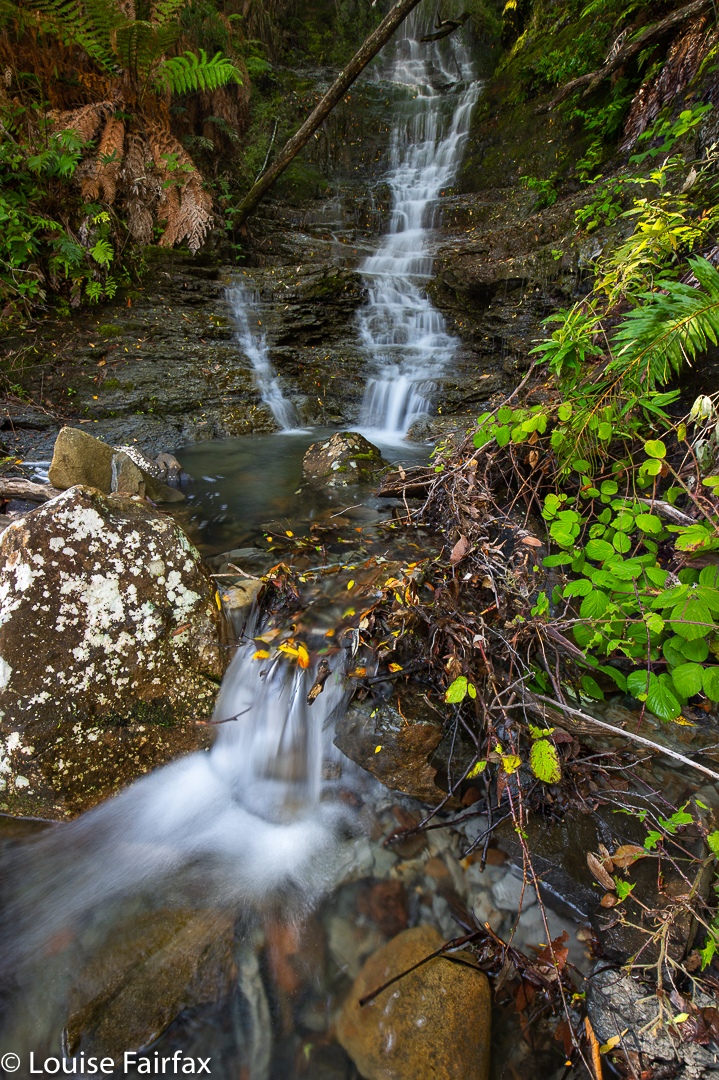
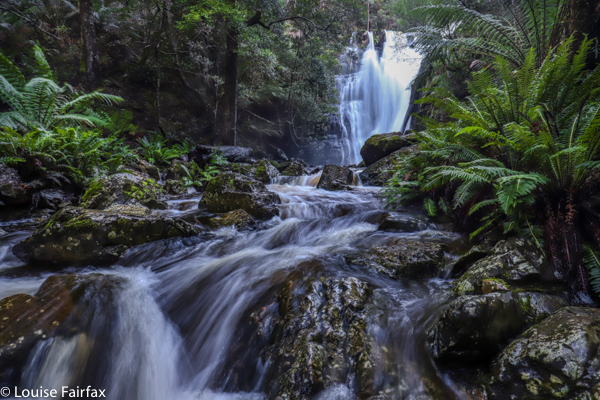
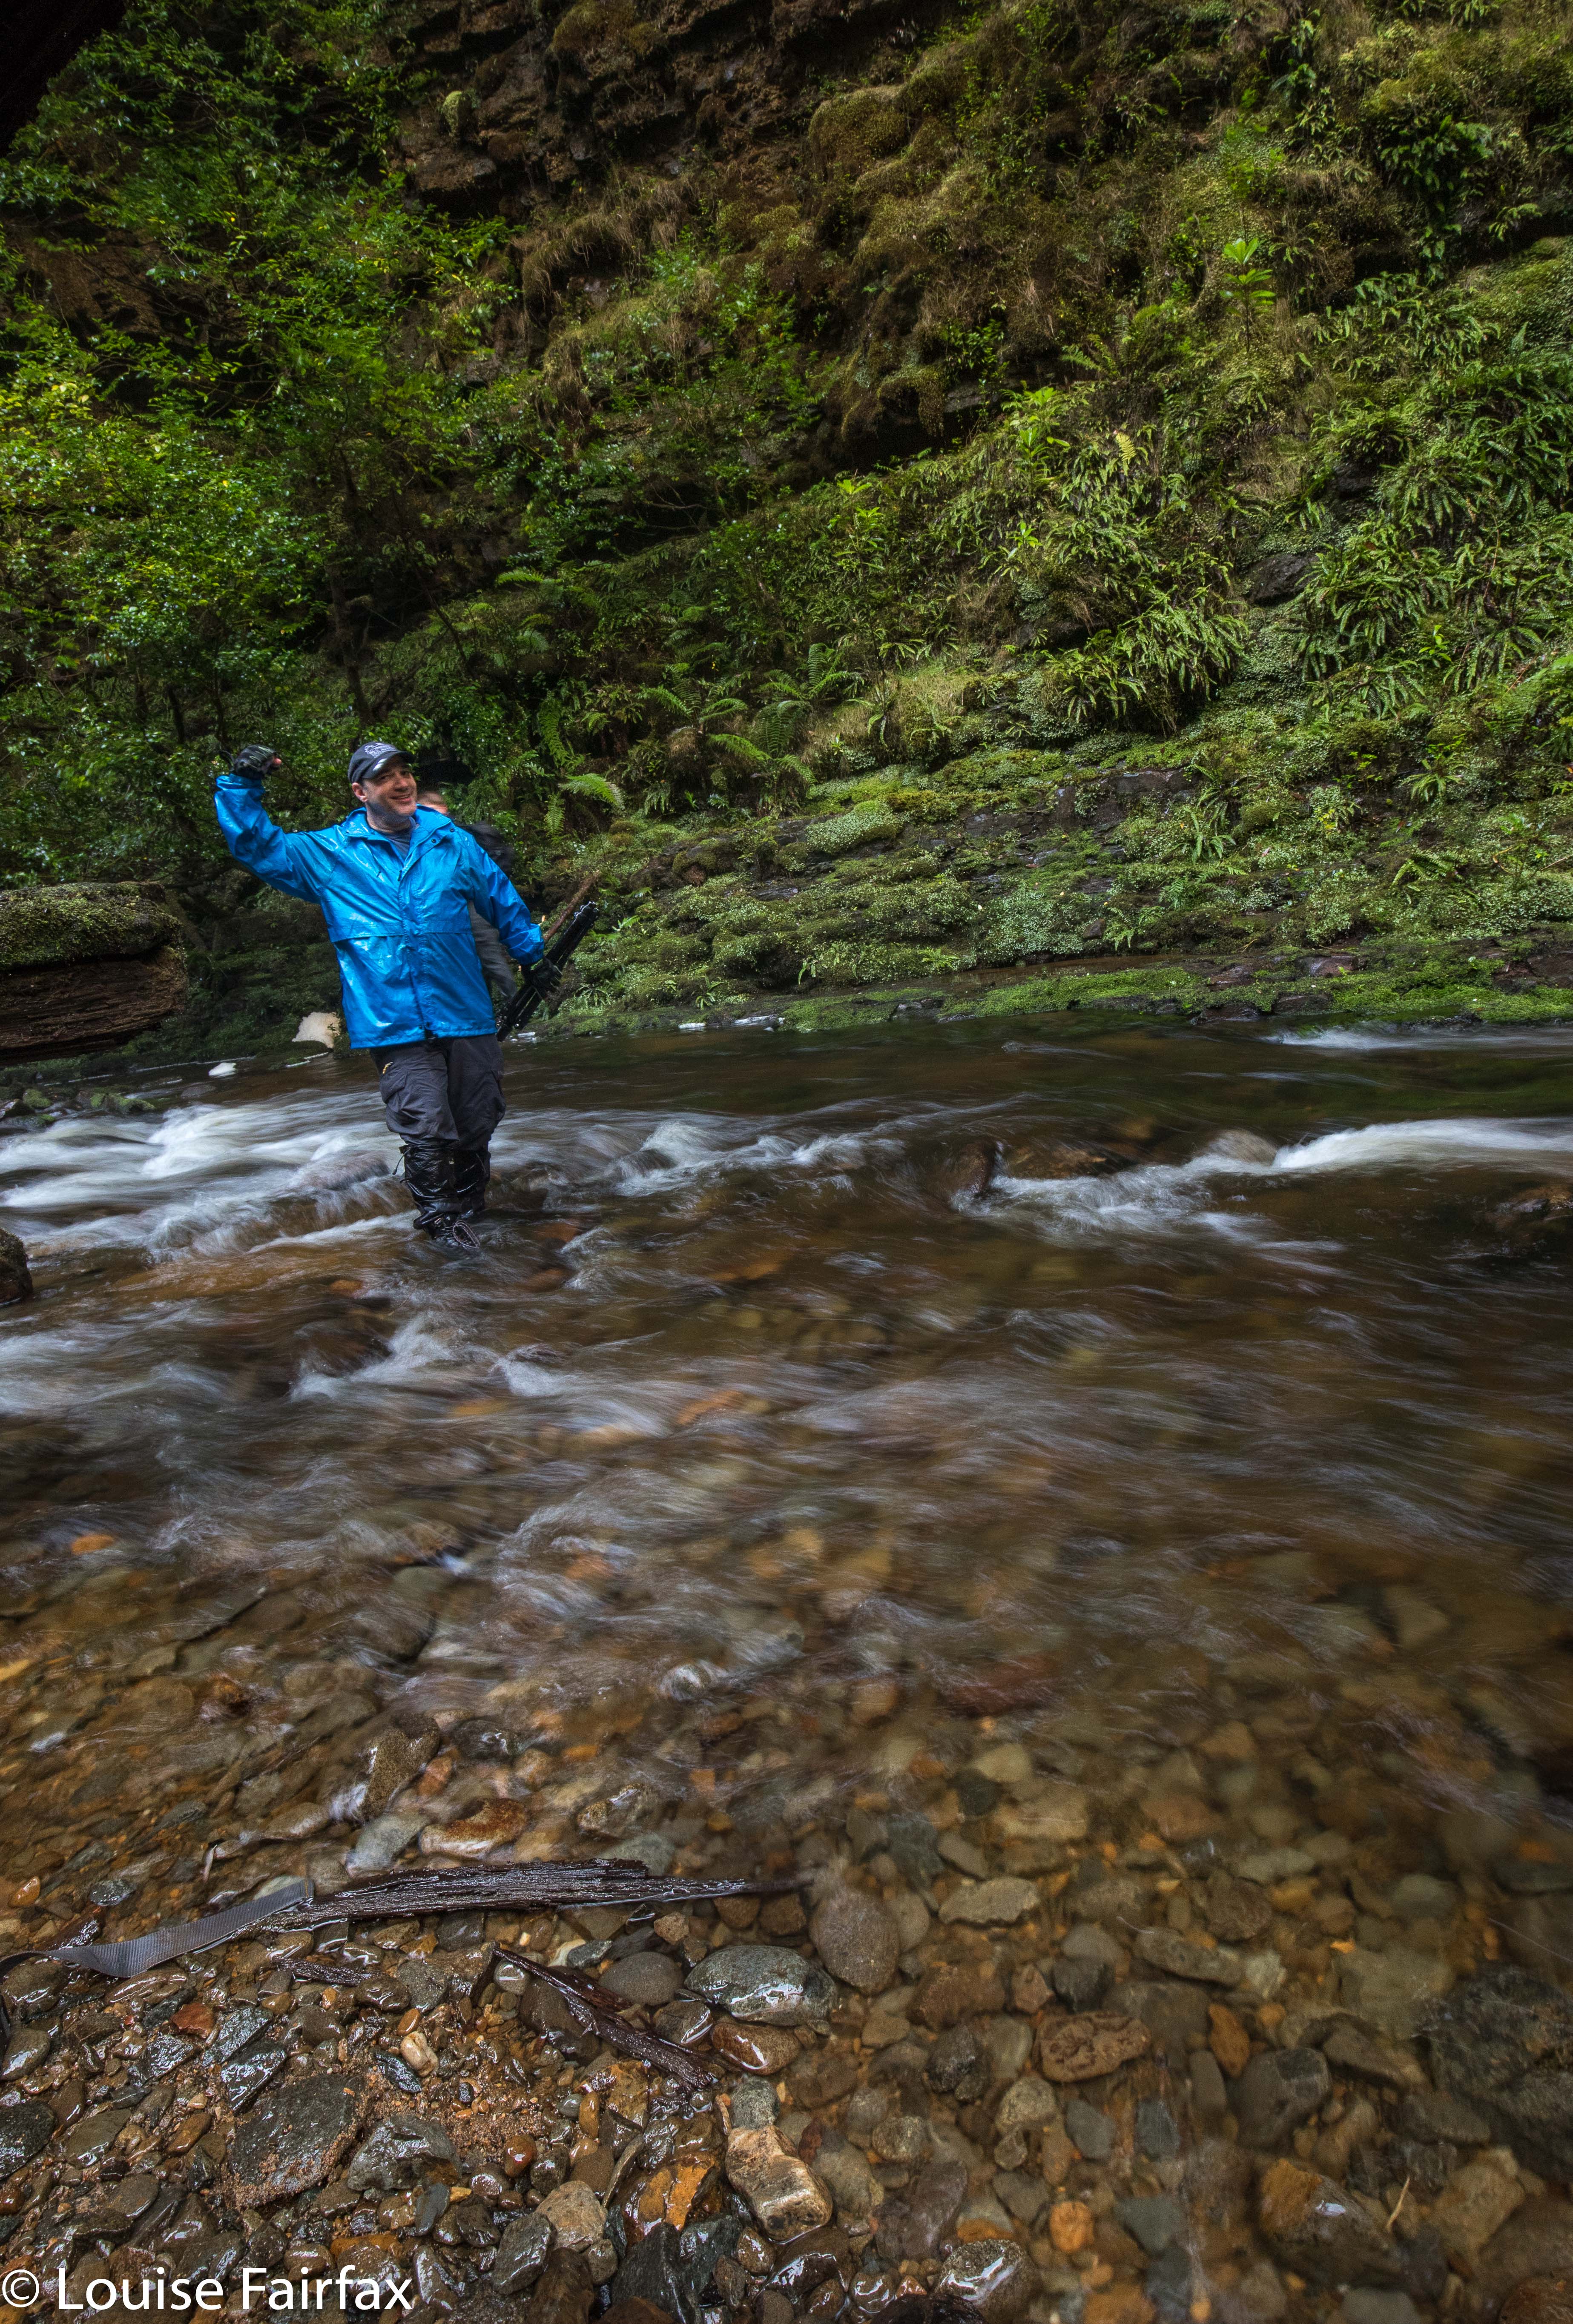
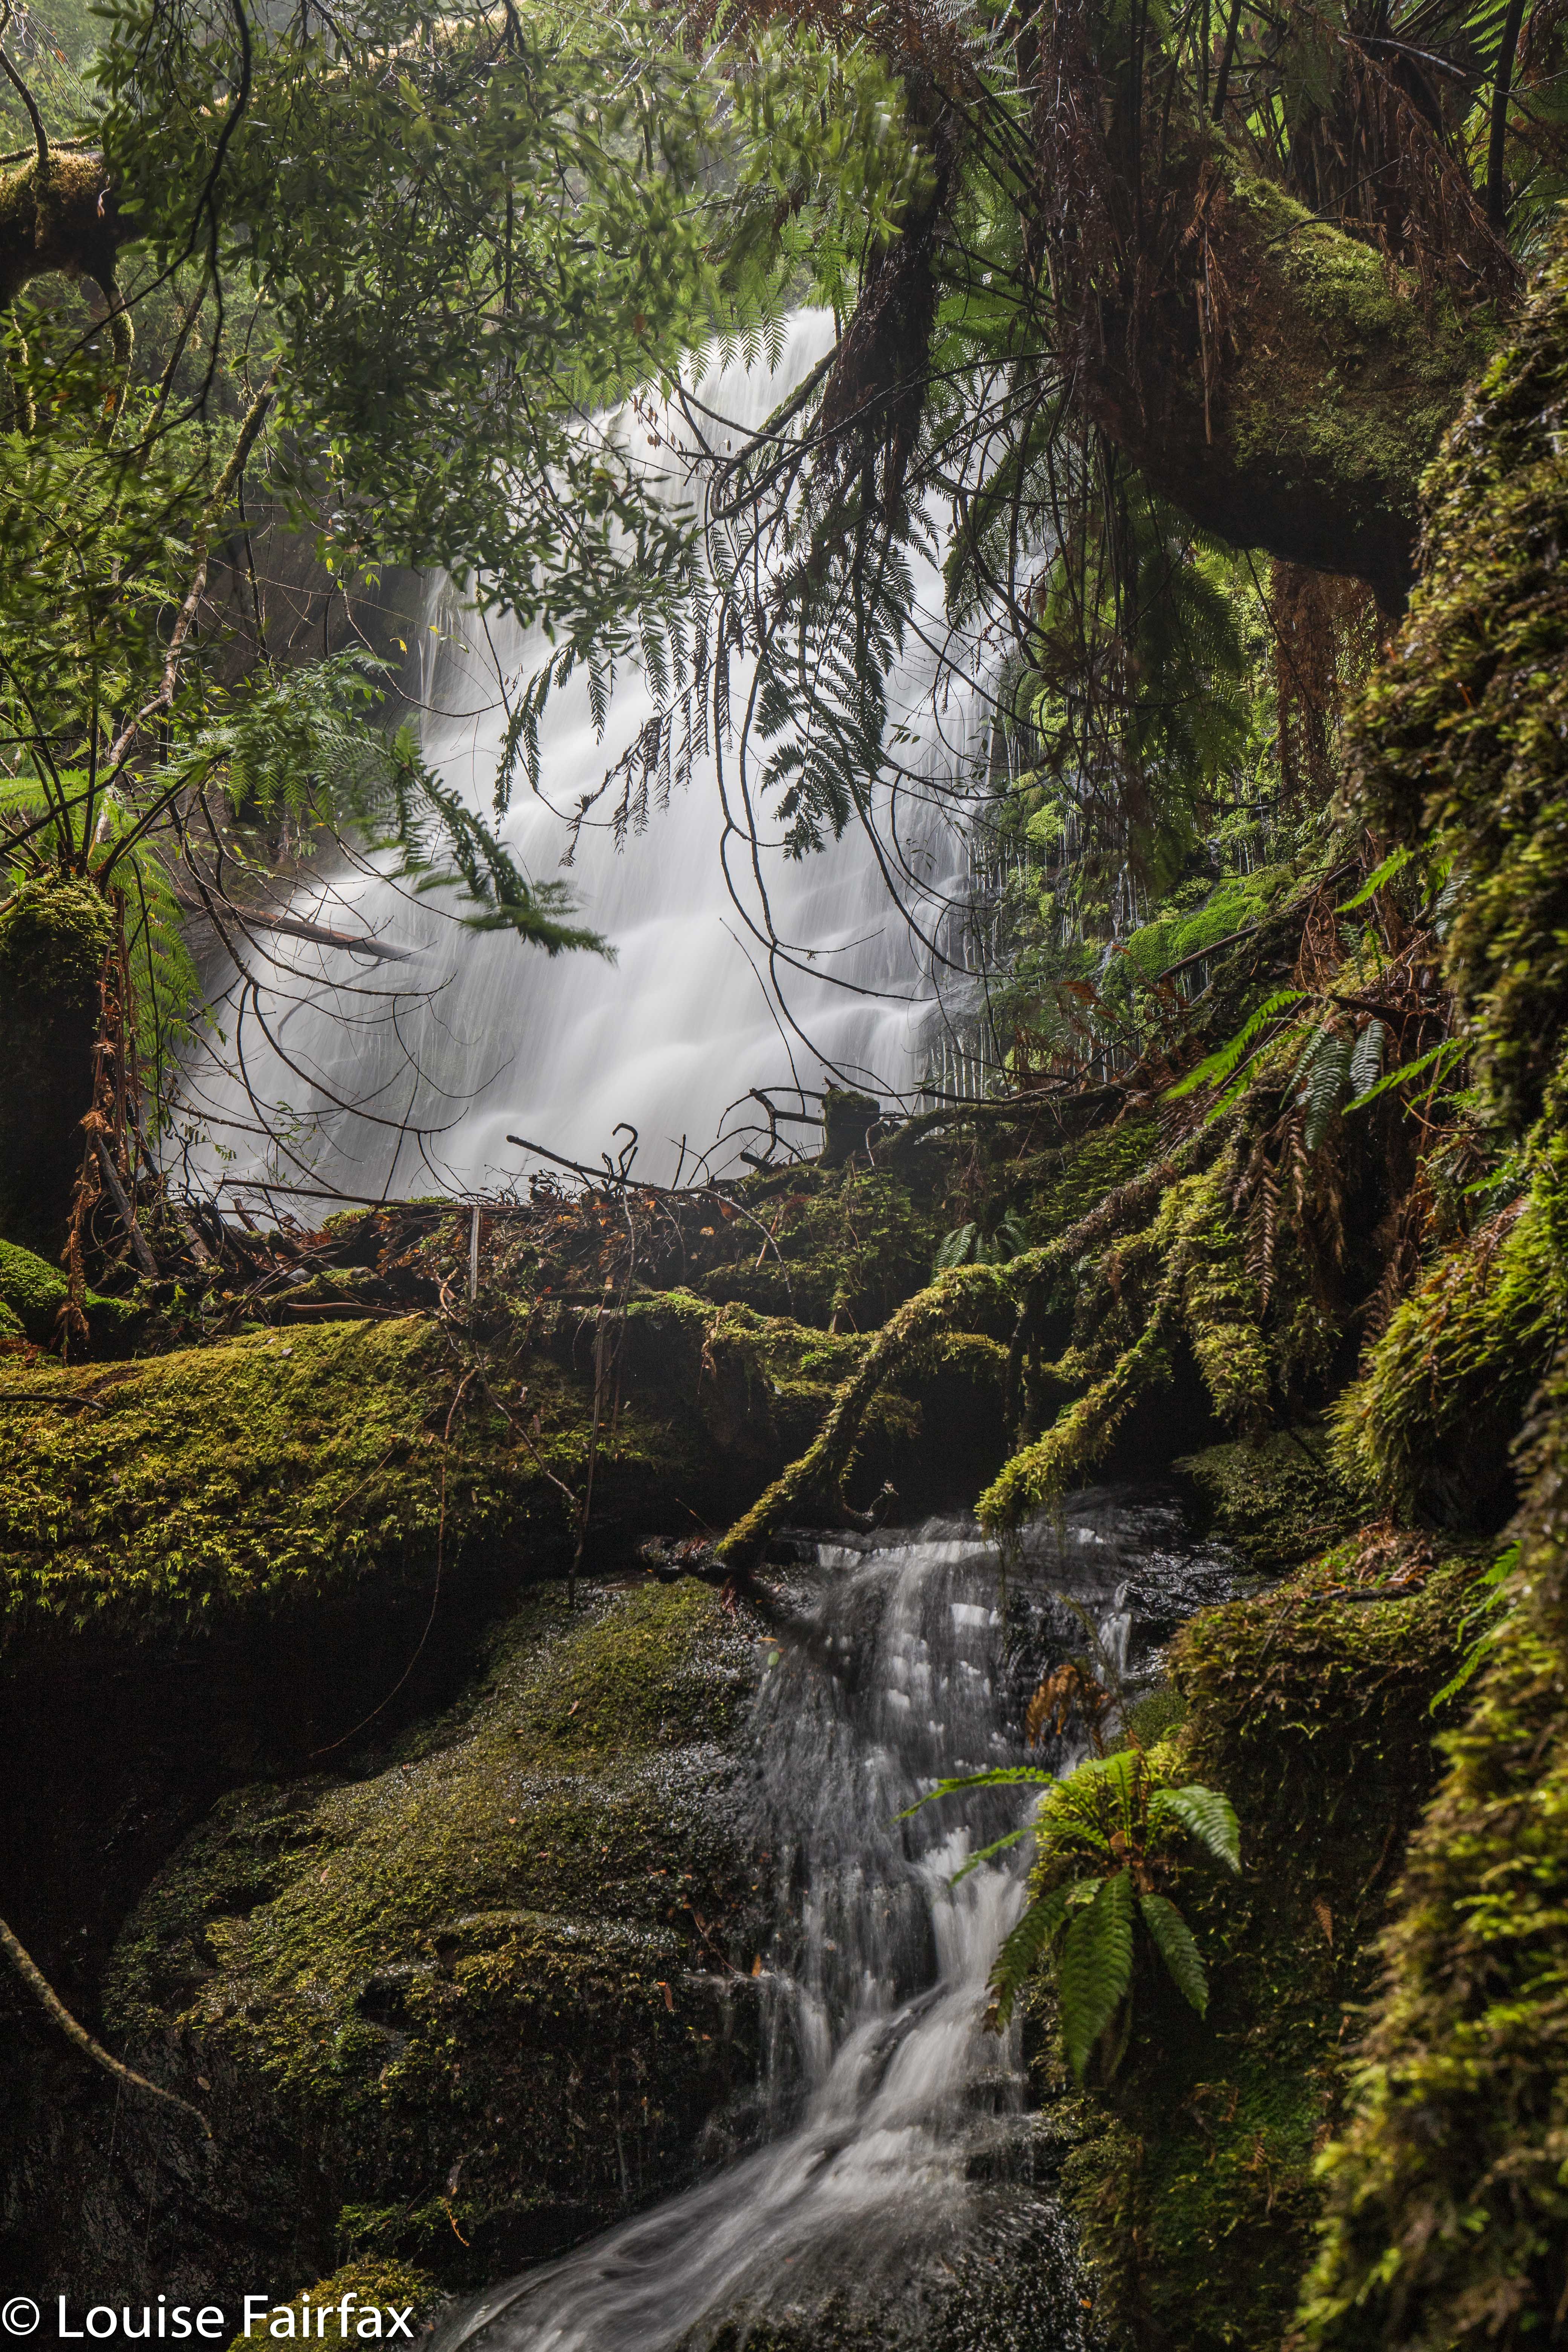
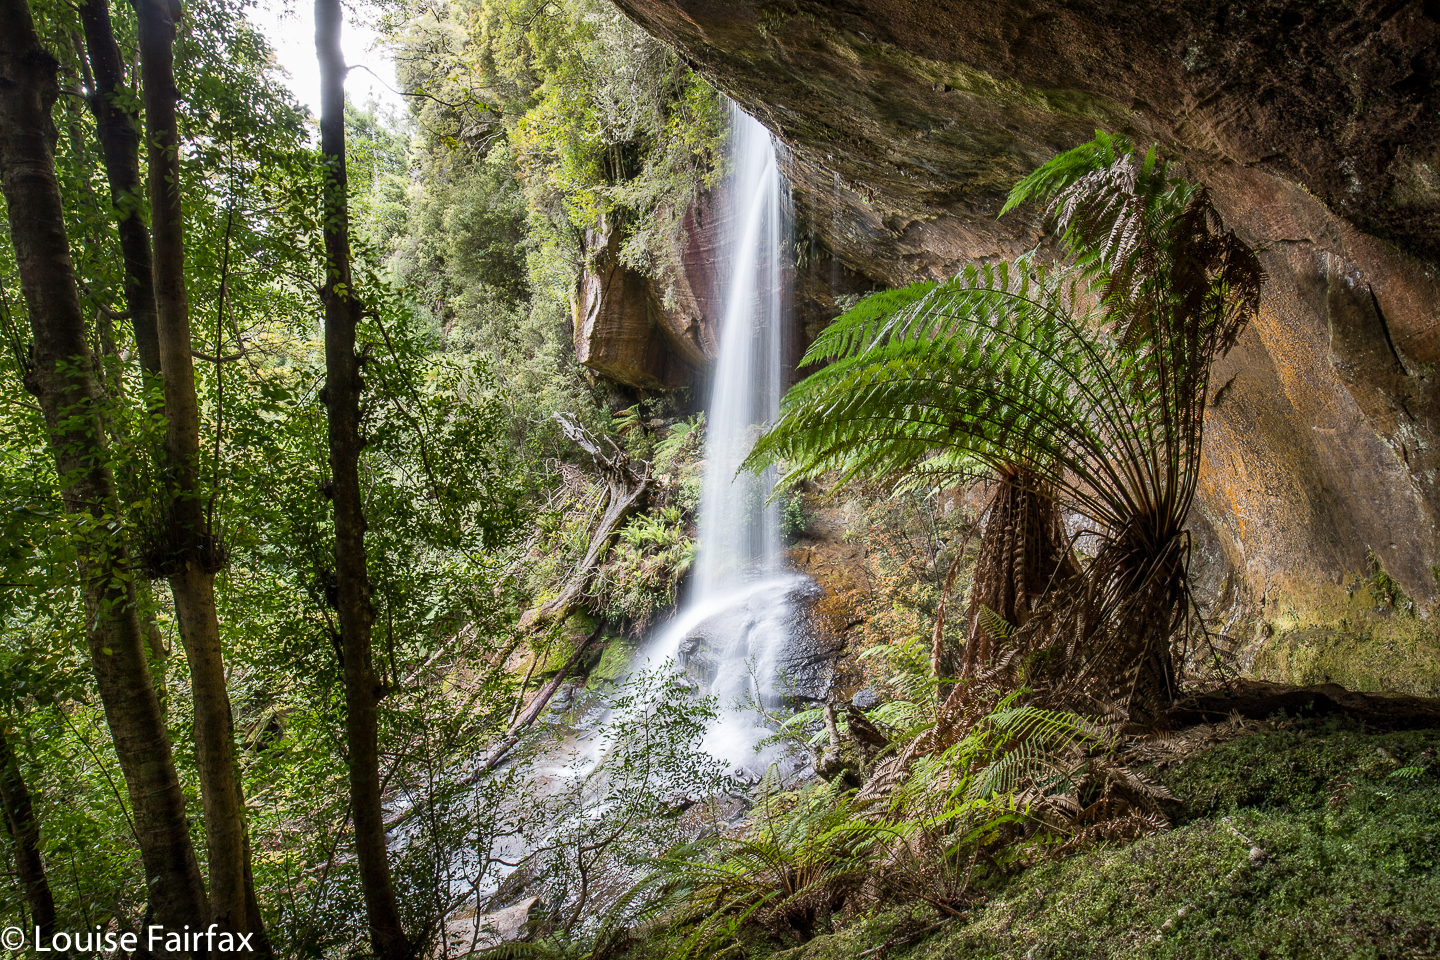
Shower Cave Falls
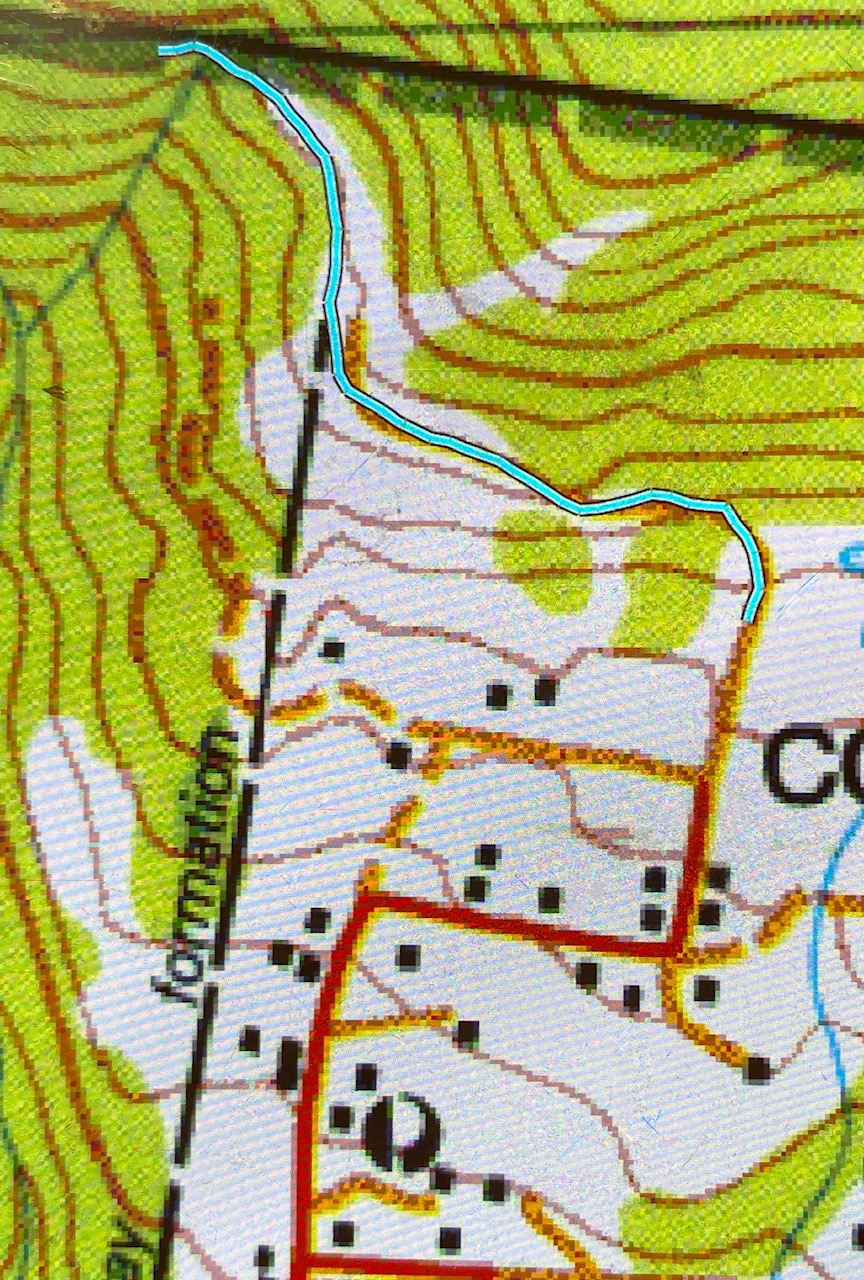
As said, I began my photography at the end of the waterfall line, as it were (although I am sure there are more up higher which I will return to explore one day. This was just a short recce): with the higher of the two mapped falls being Split Rock or Cleft Rock Falls. I had no idea whether the track that my very out-of-date map has was still there, or if it went near enough to the falls to see them from the track. The answer is, the track goes all the way to the upper falls, and even beyond, in a kind of loop returning through the middle of the Split Rock. The star on the Waterfalls of Tasmania website for some unknown reason is at Split Rock, and not at the falls, which are further on, and higher up. List maps has them pretty accurately marked. So does my map below, where I have marked all four waterfalls I saw with a yellow waymark. The position of these top falls, in particular, their angle relative to the wind, meant that there was quite a  strong air current in their vicinity; they chucked out quite a bit of spume at me, and all the ferns were doing a merry dance, which made long exposure photography tricky. Things were much calmer lower down. Despite these difficulties, I stayed there quite a while, surrounded by mosses and ferns and humungous boulders, all green and fleshy and soft. After a while I ran out of excuses to stay, so packed up my gear and began my way back down the slope. I felt so sad to leave. The time gap between Shower Cave and Split Rock falls was 8 minutes up; 9 minutes down. Time for more photography.

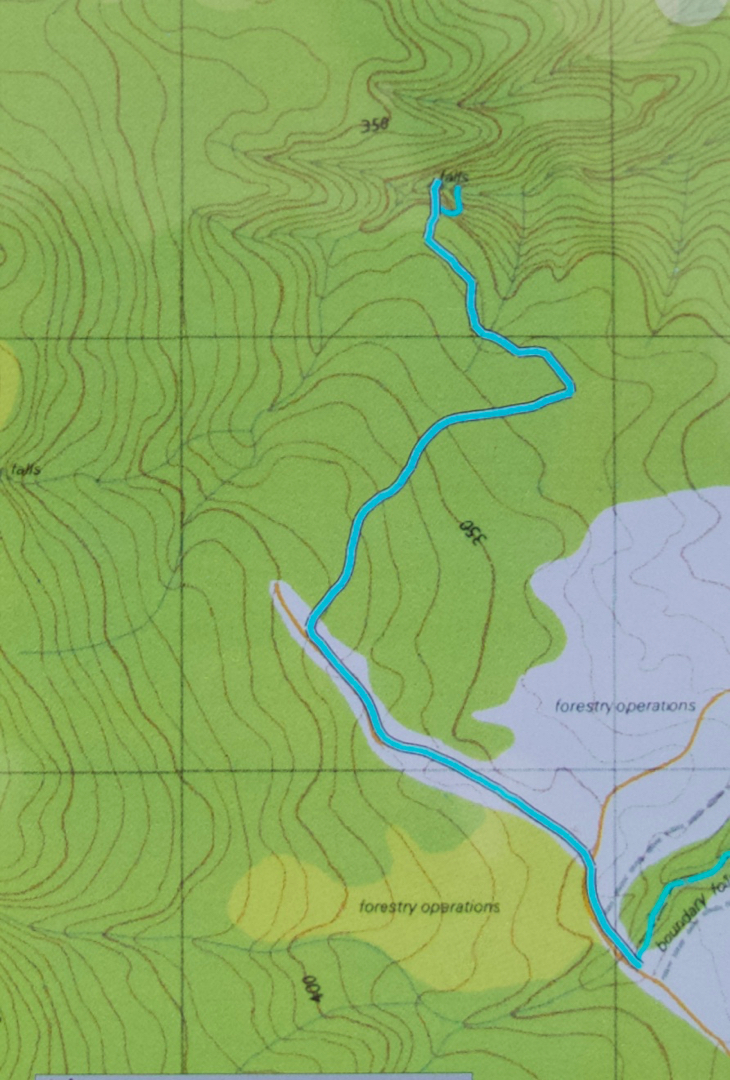
There was nothing tricky about the track, which I found to be well marked and extremely appealing, fitting beautifully into the landscape. I have, however, heard of people getting a bit lost, and / or failing to find their goal, so I guess I should add the warning to be alert and pay attention to the signs of the bush that tell you people have been this way. The path is very satisfyingly steep. It was 1.5 kms out, and in that 1500 ms, it climbed 300 ms: that is a 20% incline. That is steep!! (Note the WoT website incorrectly tells you this is a 6km journey. They have doubled the return journey. It is 1.5kms each way, which makes it a 3km return trip. Steep it may be, but not harshly or uncomfortably so, and the scenery is utterly distracting. The boulders and overhanging cliffs dwarf you, and are huge fun.

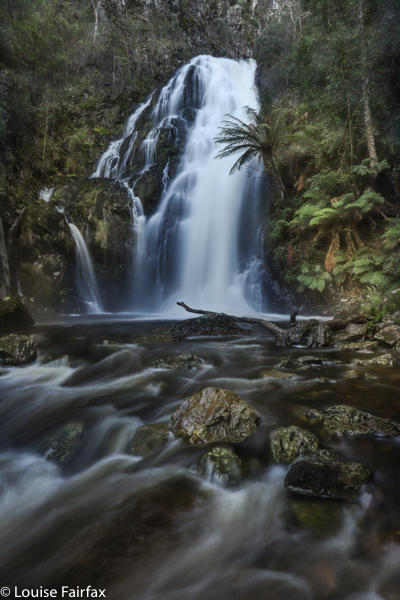
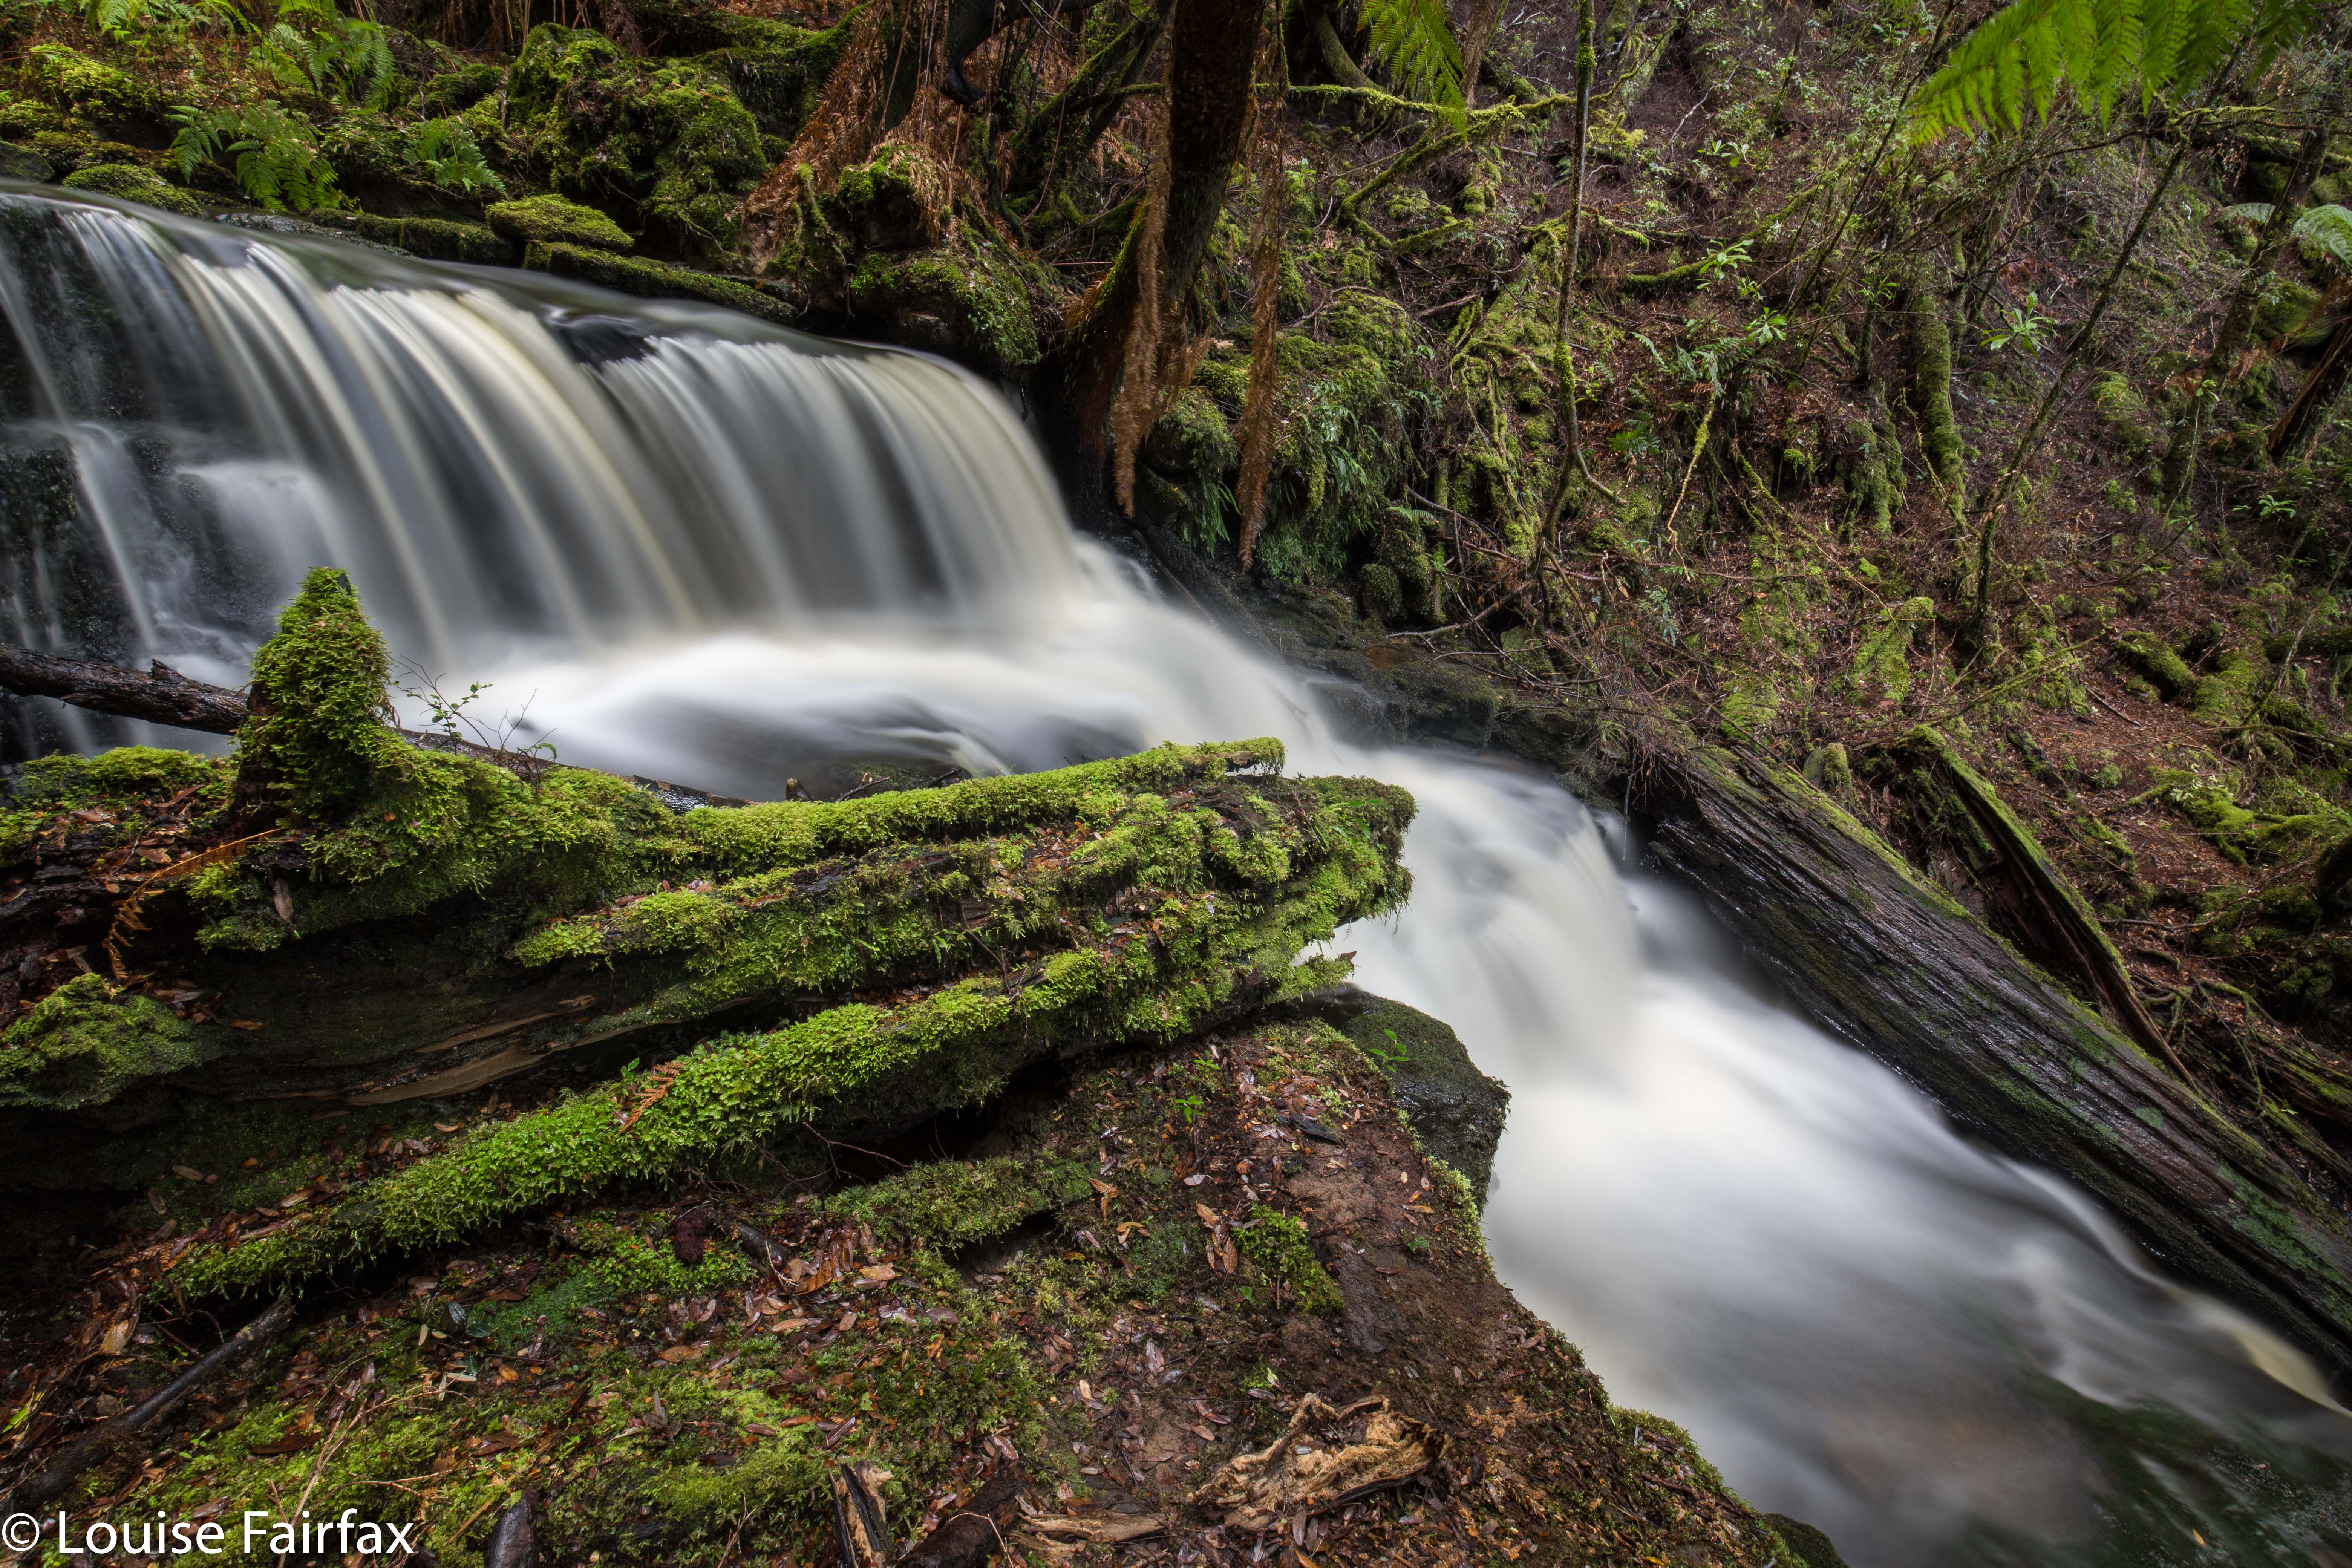
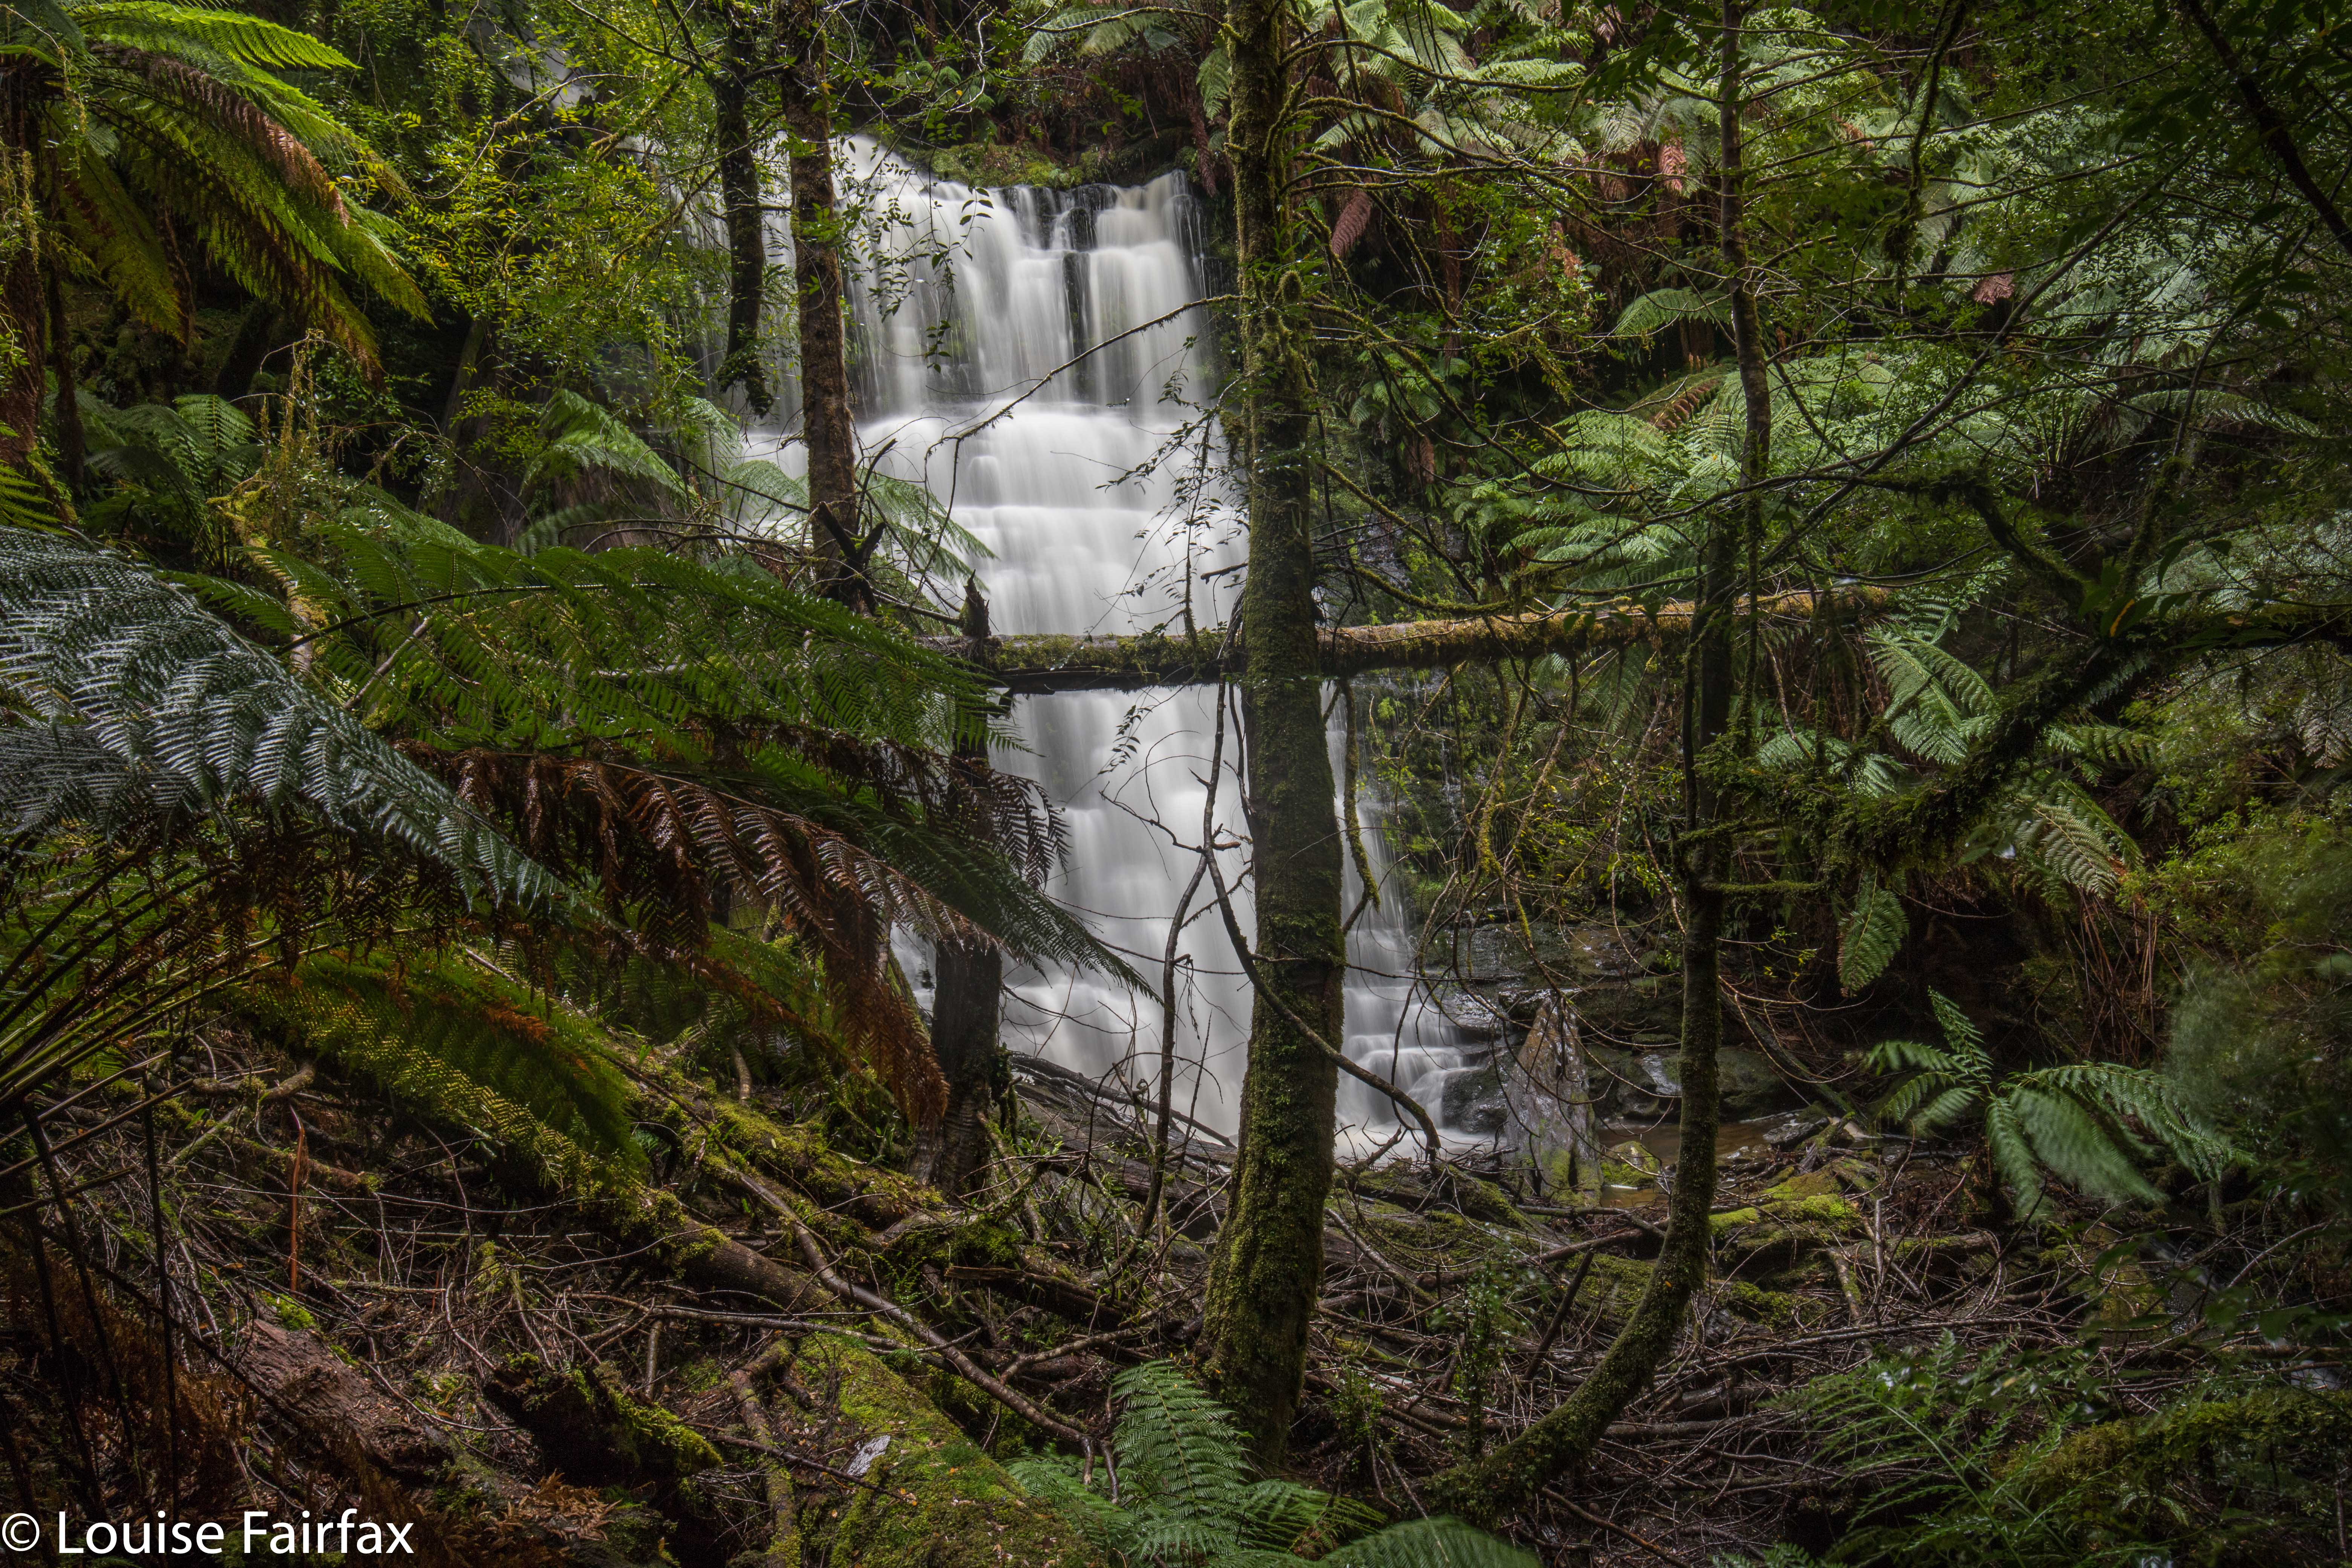
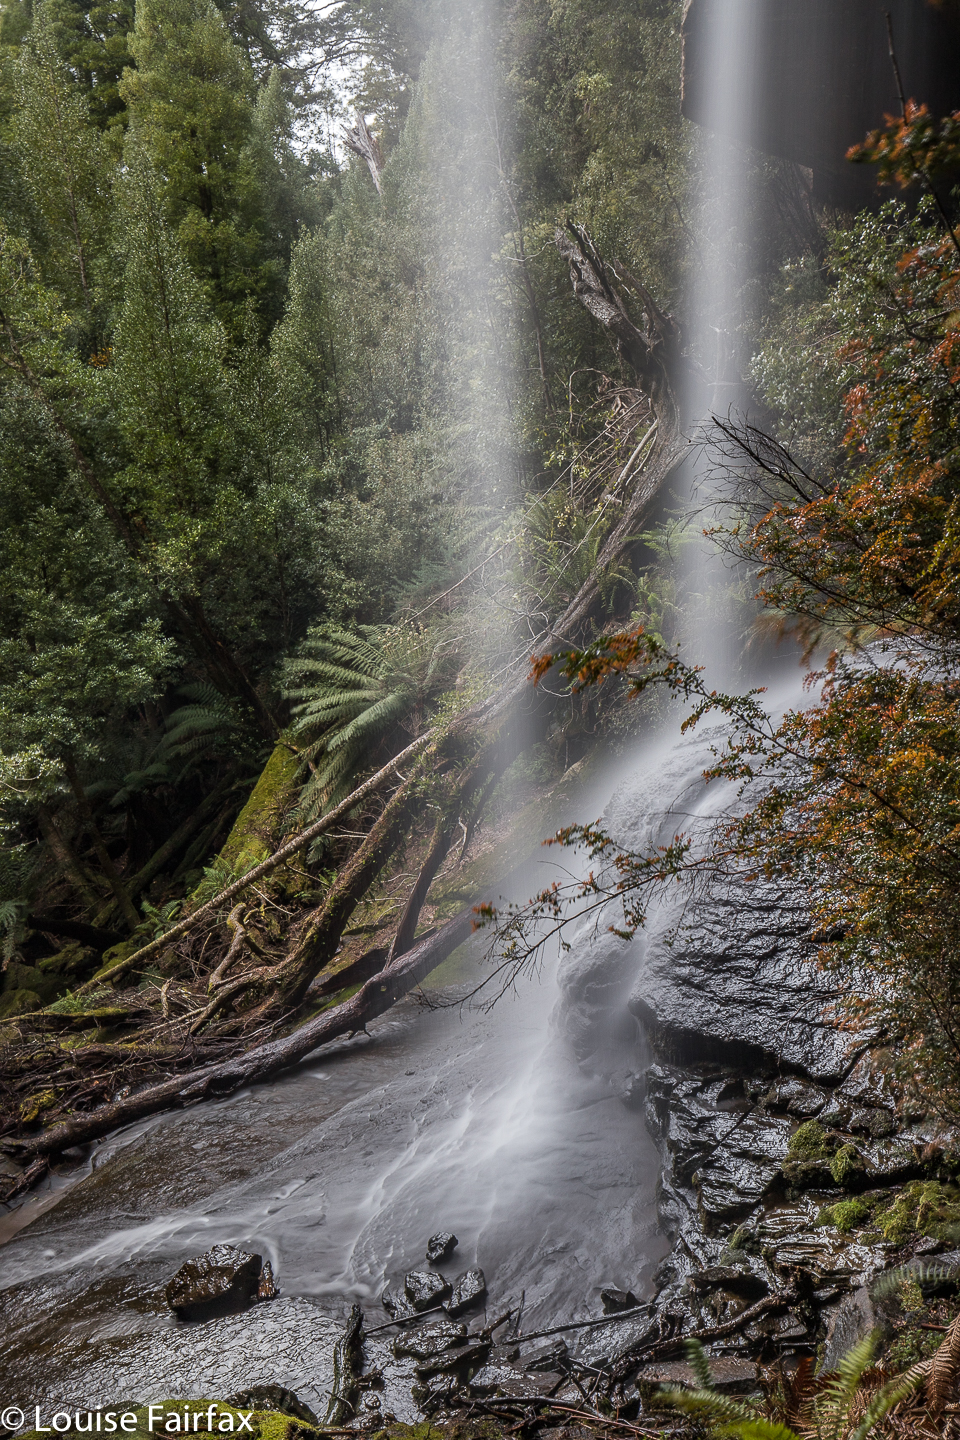
Unnamed waterfall short of Shower Cave Falls
The Meander River was also looking her most gorgeous self today, so after I had finished, I sat down there by the gurgling waters and had lunch …. and then did a spot more photography before setting out for home. I needed caffein to ensure I didn’t fall asleep at the wheel, so went to my new discovery in Deloraine, ‘Deloraine Deli’, and had a lime and raspberry tart for desert as well as an excellent cappuccino.


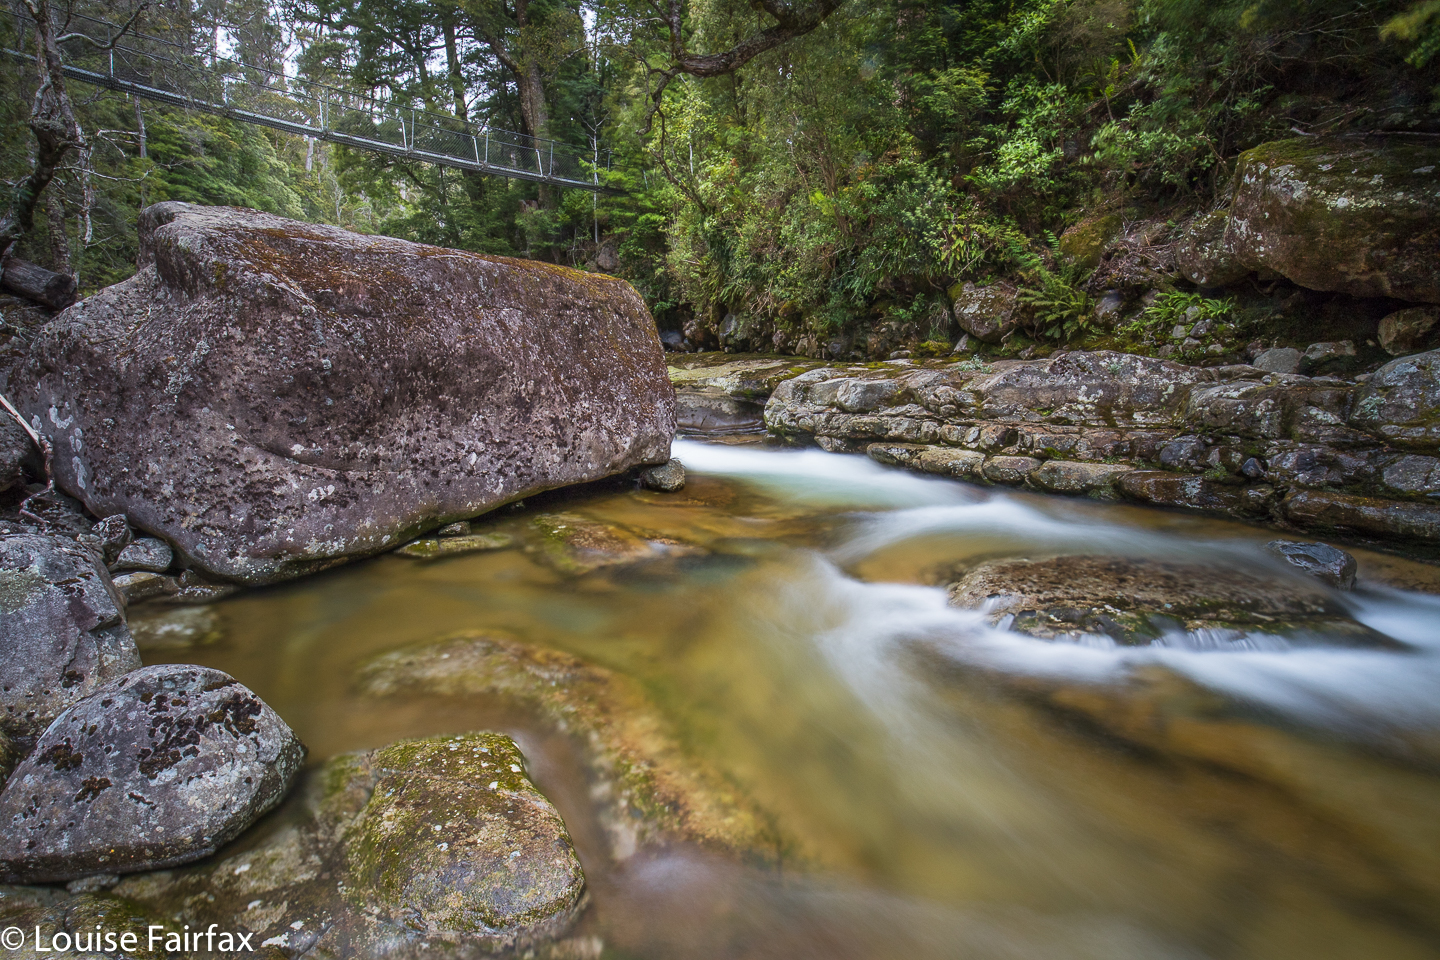
Suspension Bridge over the Meander River at the start of the walk


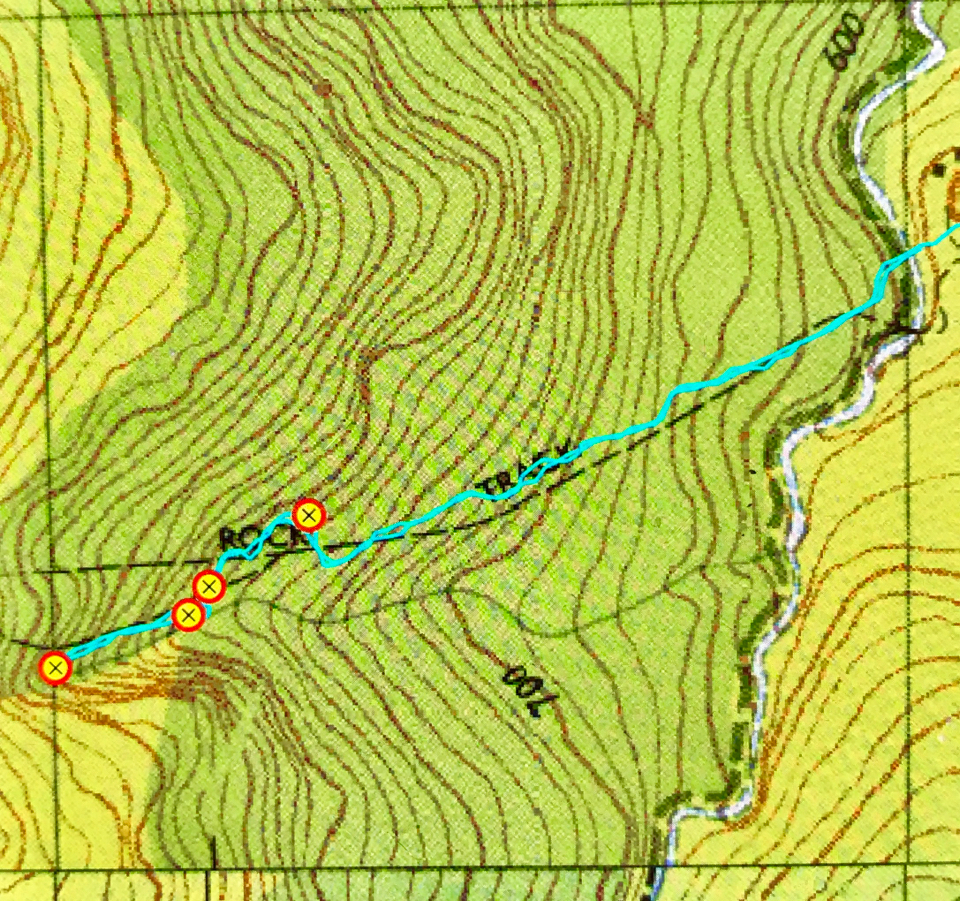
Map of the route. The starting point is the Meander Falls carpark, only, instead of heading up the hill to those falls, choose the little path on offer that leads down to the river. Split Rock has a blue signpost. From right to left, my waypoints are: Split Rock, unnamed falls, Shower Cave Falls and Split Rock / Cleft Rock Falls.

Mathinna Falls 2018 Aug

Mathinna Falls, 2018, 1st Aug


Tessa and I didn’t set out for Mathinna Falls until after lunch (in Launceston). The days are winter-short, but google said it would only take two hours to get there (correct), and about ten minutes to walk from the carpark to the falls (also correct). We were thus at the falls by 3.30 pm, which should have been just about perfect. The day was sunny, but the valley which cuddles these falls is steep and closed in, so no sun was present to glare up the water. It was actually quite dark and gloomy in there, even at that hour, and seemed much later. My early shots have a slightly golden tinge up where the sun could reach.


I chose gumboots for this journey, figuring there’d be a lot of water, and off we set. Good choice: water burst the banks and spilled out over sections of the track. The falls could be heard thundering and crashing up ahead. I was worried about Tessa being stupid, but she was frightened, and stuck very close to me the whole time. Just a quick drink was enough for her to feel the mighty force of this water.


I was worried that the force of the water might pose tripod problems, but, well, that’s the reason I chose sirui, and it didn’t let me down: my tripod stood as solid as a rock in the rushing, pounding stream. There is no problem with sharpness in my images. My problems are mine alone, and have to do with the enormous dynamic range between the very dark foreground and side frames, and the overly light falls, made very bright by the massive volume of water. I had a similar problem in Iceland. You need to do exposure blending, and you need to have photos of very different exposures. I didn’t go fast enough on the falls part of the shot. I need to be more extreme next time in this situation. I thought I had it covered, but I wasn’t quite right.


My boots were an interesting choice when it came time to climb up to the next two levels of falls. I found they were very slippery indeed on the rocks, and, as I didn’t feel like packing everything away for that climb, I negotiated the tricky climb with my camera and its filters plus tripod in one hand, leaving only the other hand for clinging to obstacles to stop me sliding backwards. I’m afraid I looked (and was) cumbersome and clumsy – not for the first time in my life. Anyway, I got there, and I saw a beautiful waterfall, and learned some valuable lessons for next time. Sunset behind Stacks Bluff on the way home was a treat.


I chose the longer but faster (for me) route via Fingal. From there, I headed north to Mathinna, and took the road over the bridge heading for Ringarooma. After that turn, there are signs to the Mathinna Falls. It’s a pity they’re not signed from Mathinna itself. The cyan line above begins at the carpark.


Reuben Falls 2018 May

Reuben Falls May 2018.


Because the Reuben Falls have a track to them, and thus seem relatively straight forward, I was less excited about seeing them than the Weld Angel Falls that we visited in the morning – but that was silly. Isabella Creek, which does the falling to create what we were visiting, was a truly beautiful gurgling mass of rushing white and tan, wending its way through a fairy forest of moss and lichen, appearing and disappearing as we wended our way along the tastefully narrow track – a rich dark brown of forest humus turned to the best possible soil – to our goal. The walk was not long – only 25 minutes there; 27 mins back – and the steep drop had no real adventures contained within, so it was not long before we were at the base.


Now the problems began. It was raining. The falls were booming and rushing with a large volume of water, creating both a breeze and a spray. I decided against any kind of front-on shots, so started clambering over very slippery bits of fallen trees trying to get an angle that didn’t involve wetting my lens (or me, but that is less important), and that was not filled with debris, which is not exactly picturesque. Shooting was very tricky. I tried to line up the angle I wanted without removing the lens cap (so as to keep the lens dry). I opted for fast shutter speeds with the same end in mind; took the photo as quickly as possible, took in minimal feedback, and repeated. I have an umbrella that I keep in my photo pack for situations like this (although the frontal attack from the falls is hard to manage, even with my trusty umbrella), but I had left it accidentally in the car, as I was using my “long distance” pack, which is more comfortable, and better for bushbashing, as it was needed for Weld Angel Falls. I tried to dry the lens in between shots and, as said, have them unprotected from the spray for as short a time as I could manage. I kept thinking: “This is good practice for Iceland, Louise. Get used to it.” I’m off there in less than a fortnight. I can’t believe it. Anyway, at least I go there with a good lesson in rain photography as a preparation.


Craig was already soaked. Might as well cross the creek and clinch the deal. He looks triumphant about something. Maybe he’s just plain happy to be there.
But meanwhile, I need to revisit the Reuben Falls so I can have time to explore Isabella Creek at my leisure and hopefully find them under lightly easier conditions. Here are some of my better attempts from this time.
(For instructions to the start, see my blog www.natureloverswalks.com/weld-angel-falls/  . Both Falls have the same parking spot and, thus, driving instructions.)

Weld Angel Falls 2018 May

Weld Angel Falls 2018 May


I loved climbing Mt Weld a few years ago, remembering the forest as being particularly lush and green, and full of beautiful fungi. I was really looking forward to visiting the Angel Falls, or, the Weld Angel Falls as Craig Doumauras of the Waterfalls of Tasmania website likes to call them, to distinguish them from the Angel Falls that are below Mt Sarah Jane near Mt Anne. It’s good to have two different names to avoid confusion. Besides, the Weld Angel wasn’t just any old angel: she was specific to the Weld area, and to the battle to preserve it from the axe, so why not call her by her full name. The falls are just a nameless line on the map, so there is no official name at this stage. The creek they are on is also nameless – an anonymous tributary of the beautiful Weld River running at right angles below.  Imagine being that beautiful and still lying in anonymity.


I had read Dennis’s blog in https://hikinginsetasmania.blogspot.com/ and marked waypoints on my phone map in readiness for when I would go one day. The big drive put me off. It’s a long way from Launceston. Eventually, Craig and I agreed to go to coincide with a conference he had in Hobart. That way, I would only have to do the Launie to Hobart section of the drive. Yippee. And Craig and I always have fun when we waterfall bag together. Meanwhile, a new ingredient was to be added to the stew: southern waterfall bagger extraordinaire, Caedence Kueper, was to join us as well. Three waterfall maniacs in the one car. Would it cope? It belonged to Craig, so it had to be used to it.


We turned off at Geeveston (having become a trio at Huonville – following coffee stop number two within the confines of an hour), travelling towards the Tahune Airwalk on C632, Arve Rd. However, we didn’t continue left down Arve Rd near the Walk, but went straight ahead on a road, Southward Rd, that seems to go forever, and turned around many times. We crossed the Huon River while still on this road, but not too long thereafter, turned left onto Eddy Rd, Next turn was a left again, this time onto Fletcher Rd, and we were on this to cross the Weld River. Fletcher Rd eventually comes to a T-intersection, where we turned right onto South Weld Rd, which takes you eventually, if you are very patient, to a collapsed bridge and whopping hole in the road. Do not even think about following these instructions without a gps device. You won’t find cute road names out there. I’ve given you names to help you read the map.
There’s a little shelf that you can walk along to get past the humongous hole that stopped you driving any further. I like looking down and seeing the creek (Isabella Creek) rushing far below.
This walking part is the same as the route to climb Mt Weld. After 1.3 kms, however, we diverge right off this forestry road, in favour of a different one, now heading NNE (see map below). Where that path does a dogleg to the left (after maybe 1 km) on the map below, there is a clearing made of piles of felled timber, surrounded by regrowth – but it’s not too hard to get through. If you go over some of the logs until a path comes in off the right, and head left (W), then you’ll pick up some faded tapes that lead you through the mess until you get back to unfelled, unrefined rainforest, when you can take a deep breath and start to enjoy yourself again. You are now in heaven. As you can see from the map, you stay roughly on contour, cross a creek, go to the turning point of the spur and head down steeply north to the falls. You are now at the top. Good luck if you want to go to the bottom. It’s very steep and enormous care needs to be taken if you don’t want to ruin the forest or your own body. My rule (apart from the regulation not to go destroying moss, ferns or other aspects of beauty) is to never go down what you can’t get up. Sliding and hoping can lead to trouble. It can also cause a mini destructive landslide as you lose control.


I actually loved the top of the falls more than the base, but both were well worth the visit. It was hard, however, to get an angle on the angel down the bottom, as there is a lot of debris at the base, and the fact that it was raining lightly, and that everything was wet and slippery didn’t help our cause. We had lunch in the forest back up the top, eating and chatting before moving on to our next waterfall for the day, Reuben Falls, a much easier one than Weld Angel Falls: it has a track. I like to do the harder one first; I find the harder ones more interesting anyway. Challenges are more fun than ease.